Summer Ami Update

School has started, but summer is not officially over until after Labor Day in my mind. I had a wonderful summer filled with traveling, hanging out with friends, reading, napping, crafting, and of course, crocheting! I also had to change over to a new computer after my old one fried (RIP!), so it has taken me a while to figure out how to transfer pictures. My goal for this past summer was to make 50 amigurumi to sell at the craft show I do in October. I am going to be short of this goal by next weekend, however, I feel like this was one of the most relaxing and fun summers I have ever had, so I will not fret about not making the perfect number of amis! Without further ado, I present to you the next in the series of the many amis I made this summer:

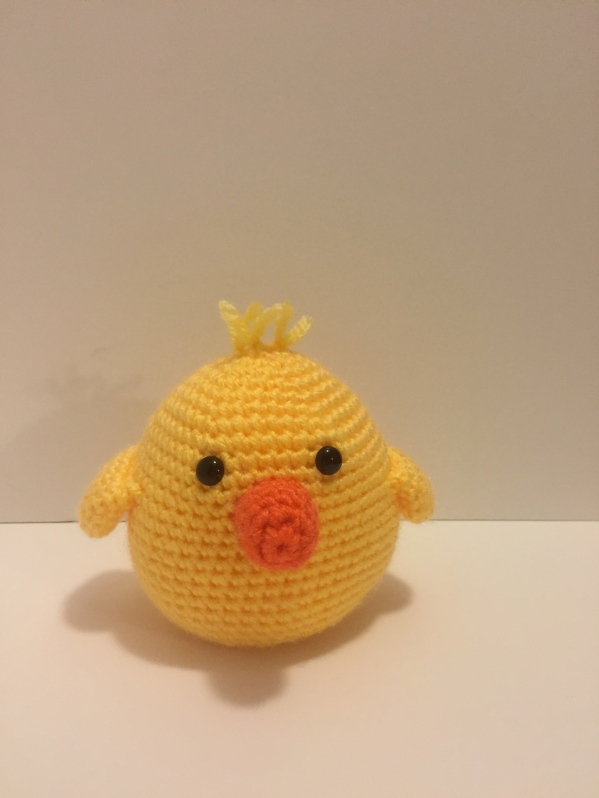
Here is a baby chicken I made. I love how his hair sticks up!

#5 - baby chicken

#5 – baby chicken

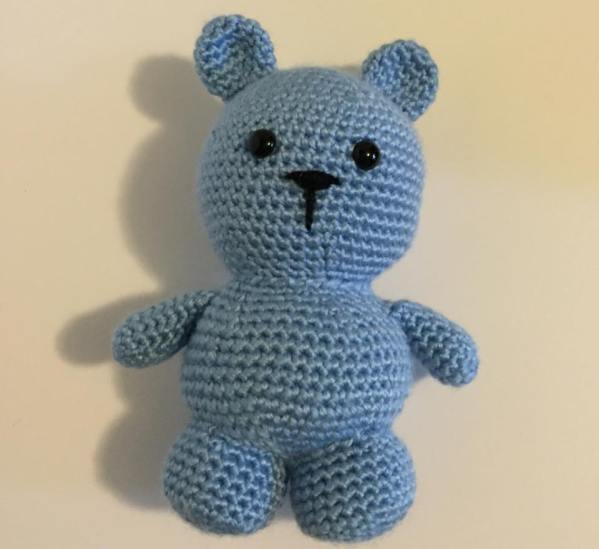
Next is Pete. He is a cutie pie blue bear.

Pete the Bear

#6 Pete the Bear

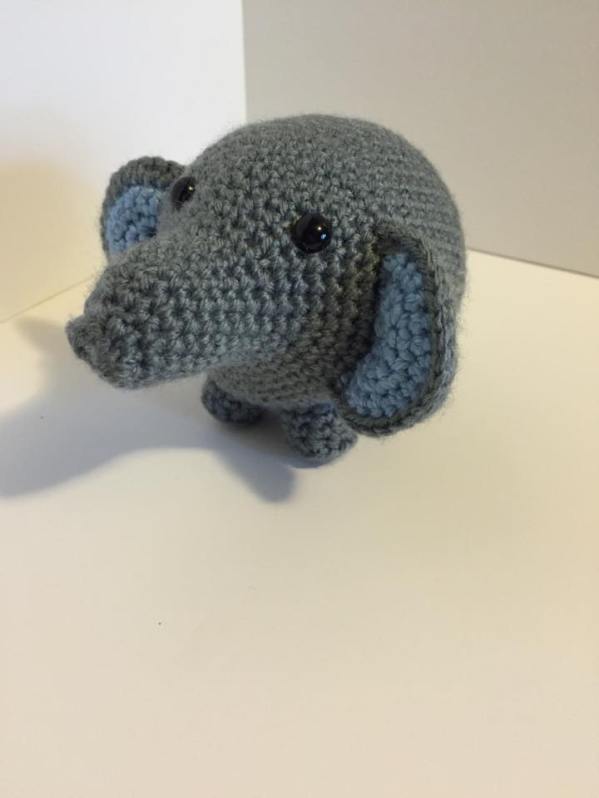
Then I have Melvin, the elephant:

Melvin the Elephant

#7 Melvin the Elephant

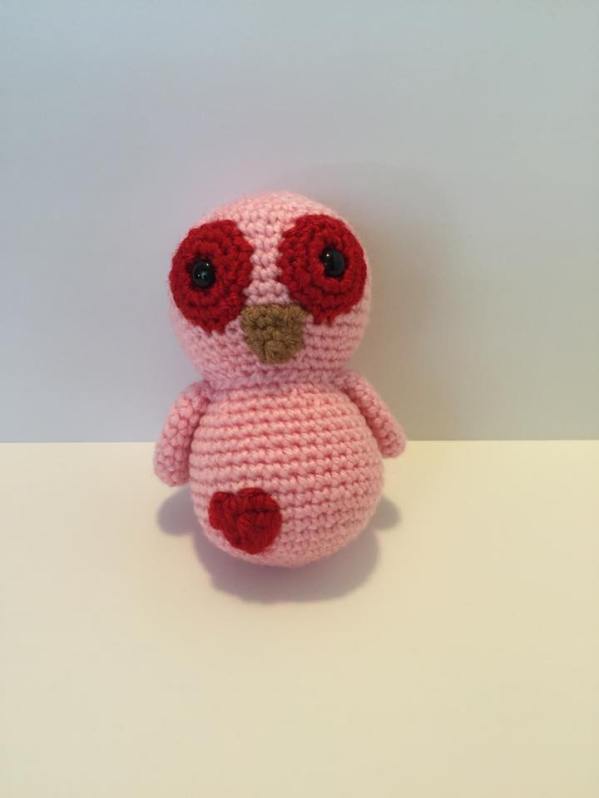
Then there is this lovely owl. She has a sweet heart on her tummy to remind you she loves you!

#8 Owl with heart

#8 Owl with heart

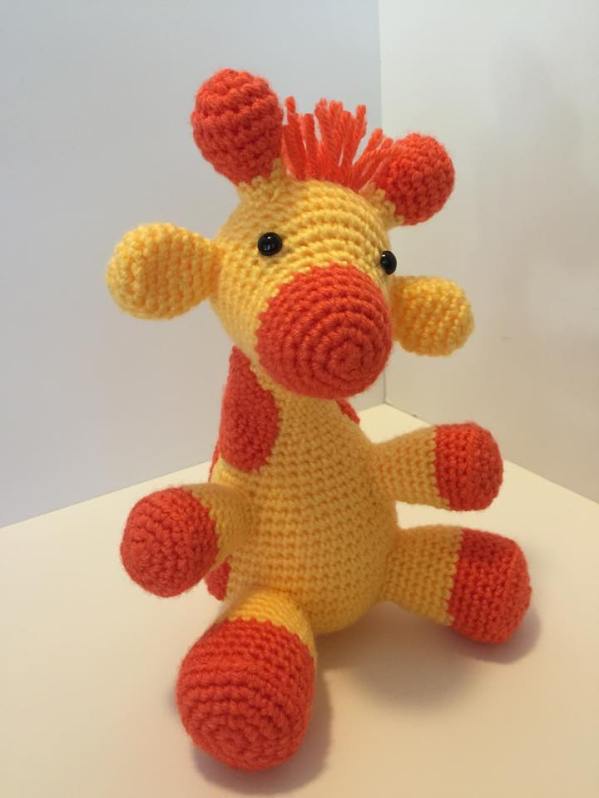
This giraffe has a really awesome mohawk:

#9 Mohawk Giraffe

#9 Mohawk Giraffe

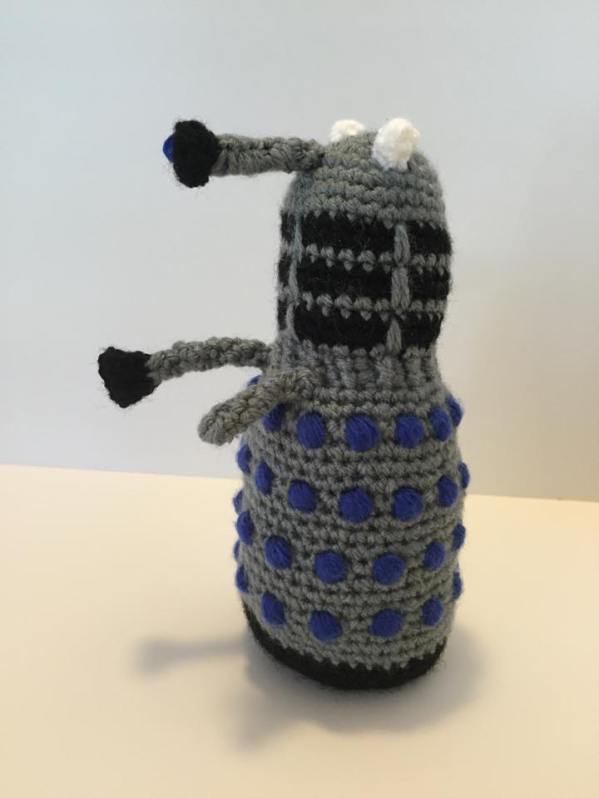
Then I made a really large Dalek, to honor the upcoming Dr. Who Season!!!

#10 Large Dalek

#10 Large Dalek

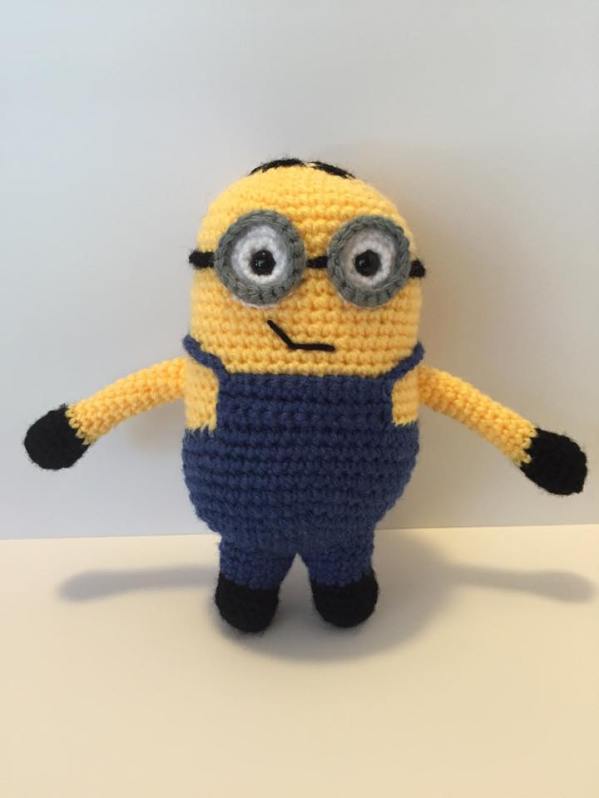
The next one is another minion, about 8 inches tall.

#11 Large Minion

#11 Large Minion

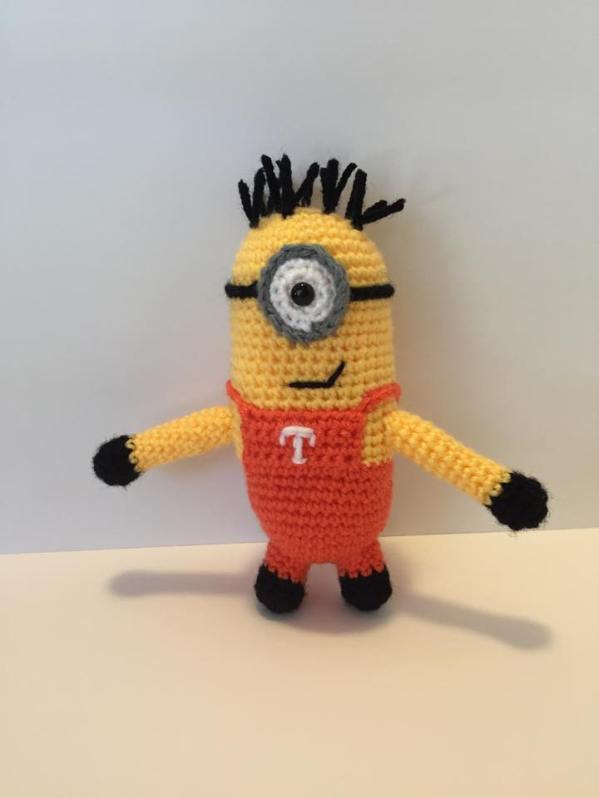
My cousin (from Tennessee) wanted a UTK minion for a friend of hers. I enjoyed this one especially, since UT is my alma mater!

#12 UT Minion

#12 UT Minion – GO VOLS!

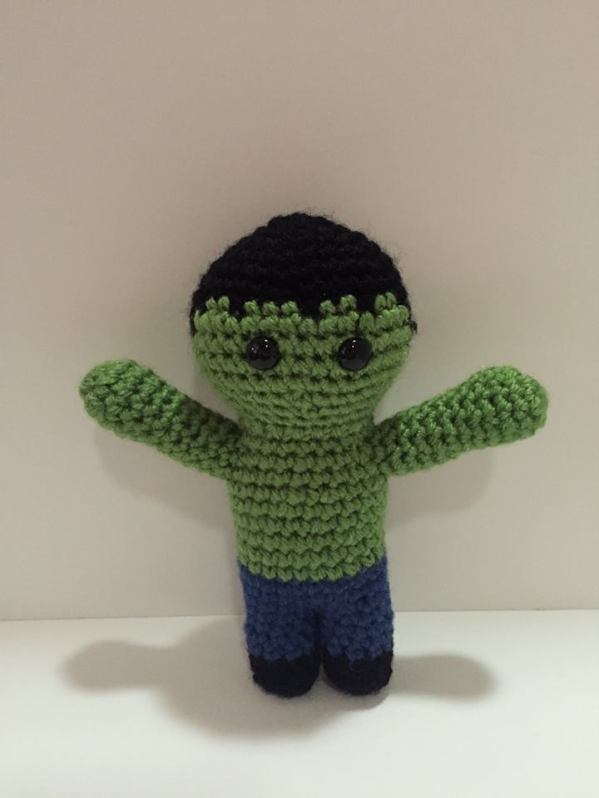
After I saw the newest Avengers Movie, I was inspired to make a Hulk! I hope I can get him some buddies pretty soon.

#13 The Hulk

#13 The Hulk

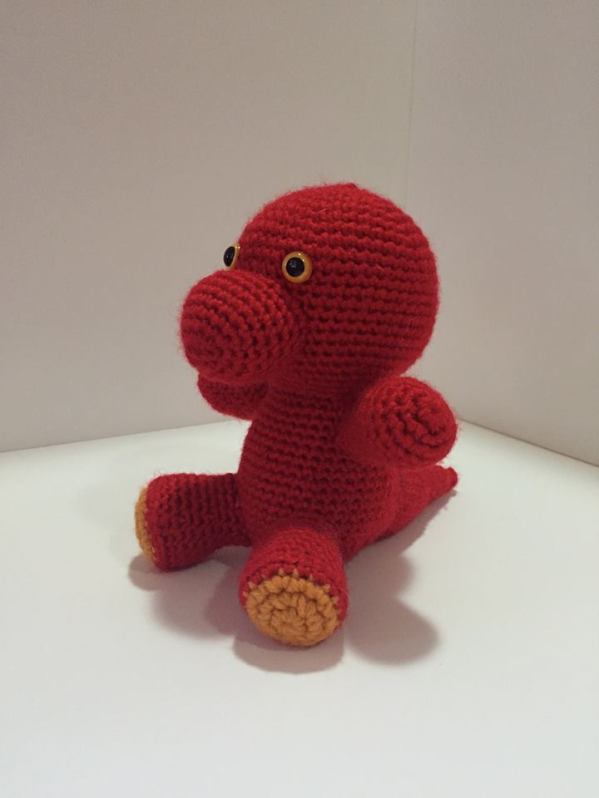
I love dinosaurs! So, I made Tyrone, the Tyrannosaurus to celebrate that love!

#14 Tyrone the T-Rex

#14 Tyrone the T-Rex

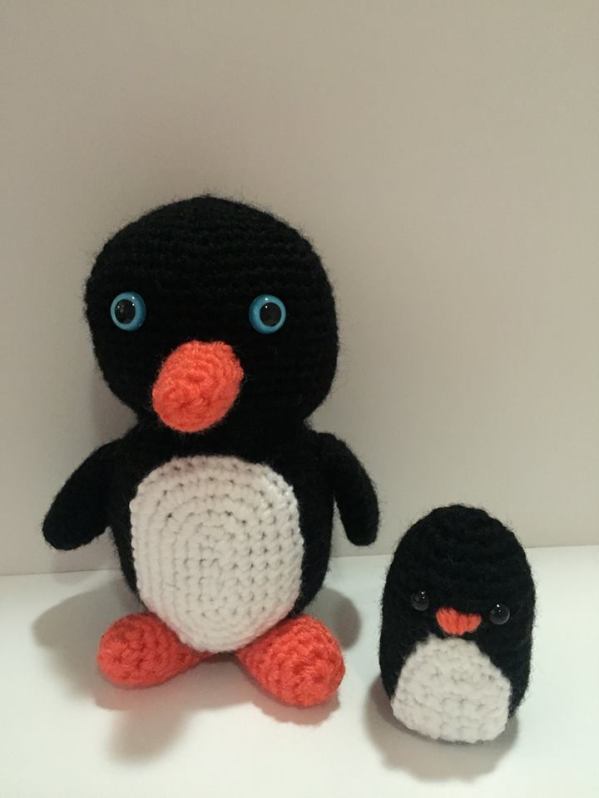
Then I made a Momma and Baby Penguin

#15 and 16 - Momma and baby penguins

#15 and 16 – Momma and baby penguins

Then I wanted to make a really fat and short panda.

#17 Fat Panda

#17 Fat Panda

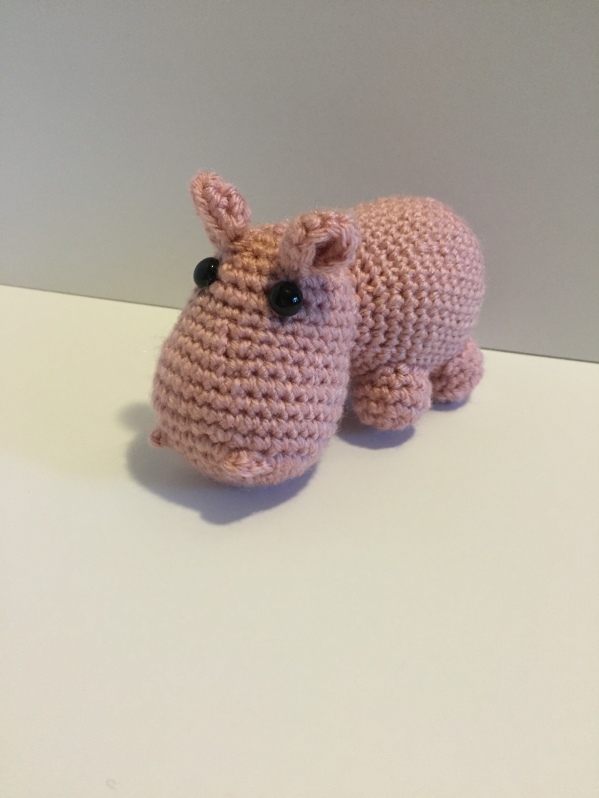
I added a pink hippo to the collection.

#18 Pink Hippo

#18 Pink Hippo

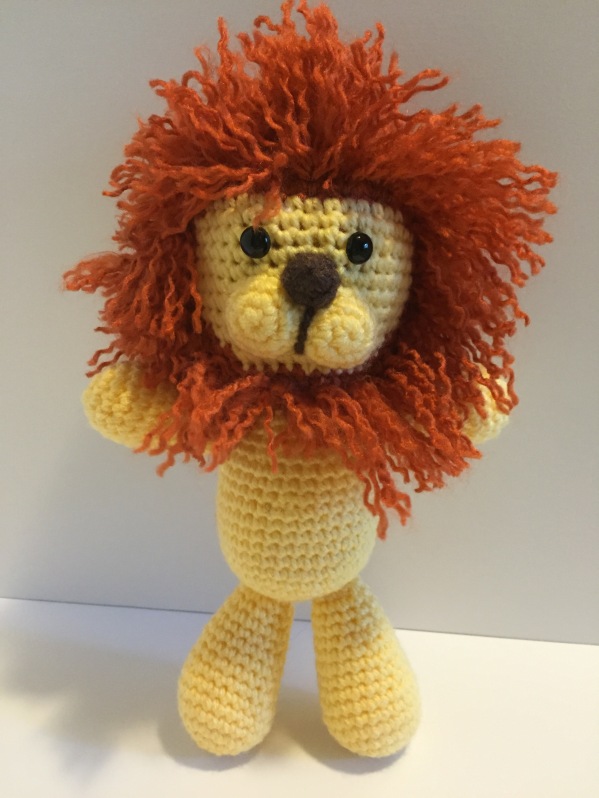
Because of the media stir around Cecil the Lion in Africa, I made a lion and named him Cecil.

#19 Cecil the Lion

#19 Cecil the Lion

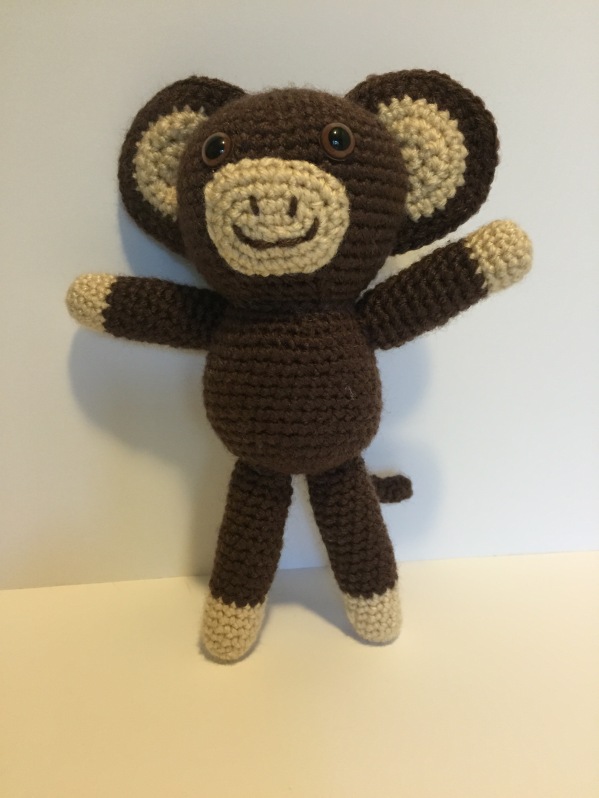
I made a super cute monkey.

#20 Just monkeying around

#20 Just monkeying around

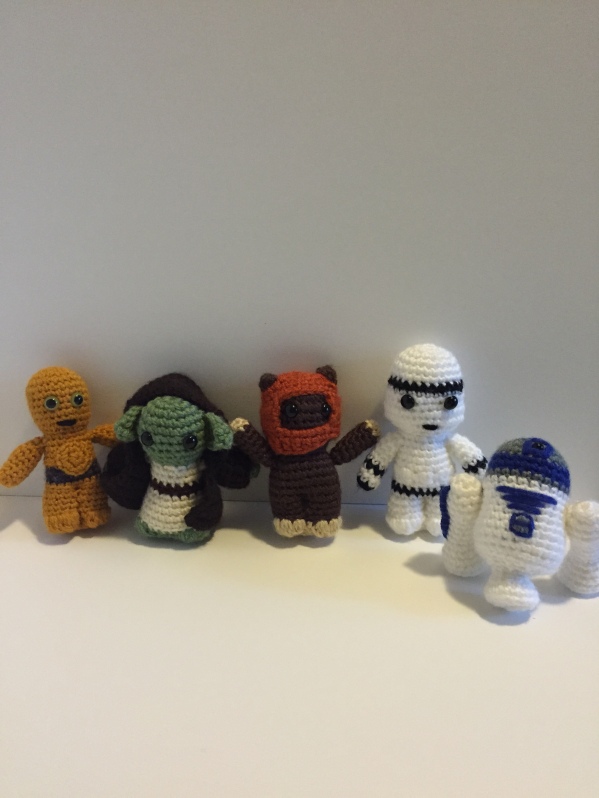
A few years ago, I bought some patterns from Lucy Ravenscar, and these are some of them:

Star Wars Gang

Star Wars Gang

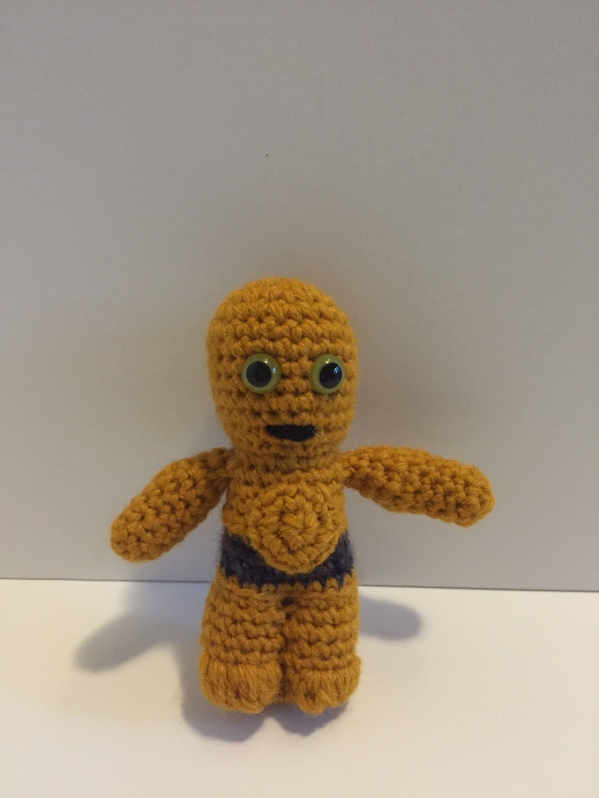
#21 C3PO

#21 C3PO

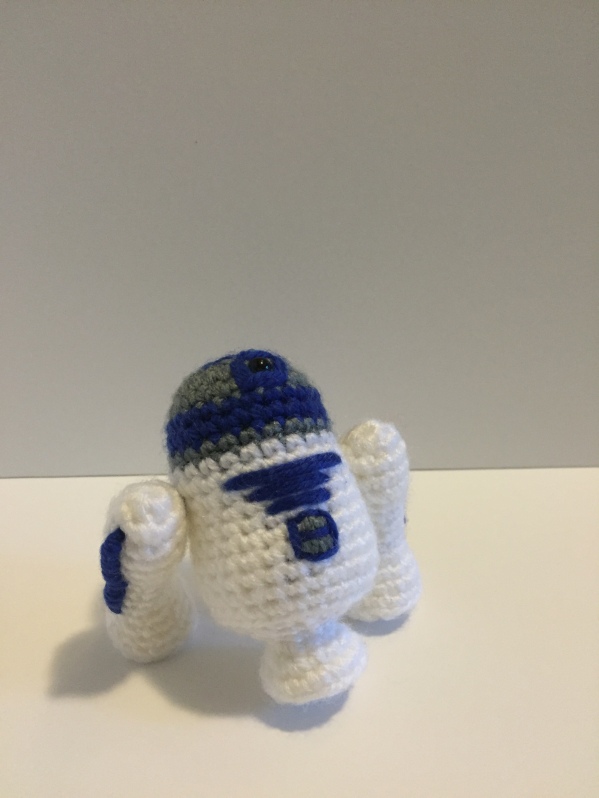
#22 R2D2

#22 R2D2

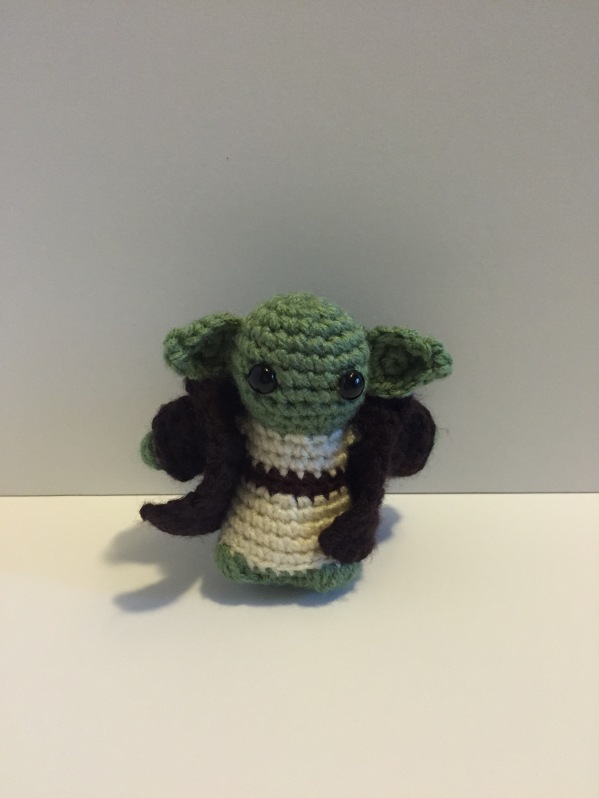
#23 Yoda

#23 Yoda

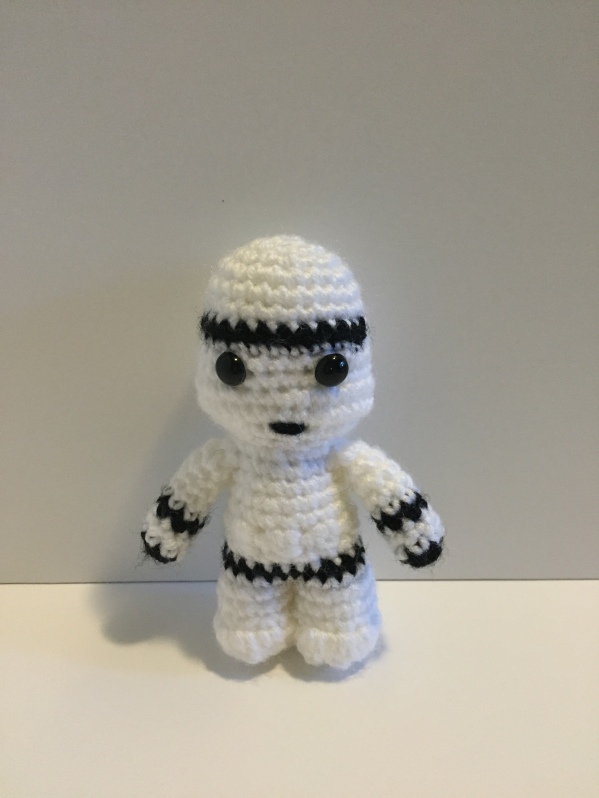
#24 Storm Trooper

#24 Storm Trooper

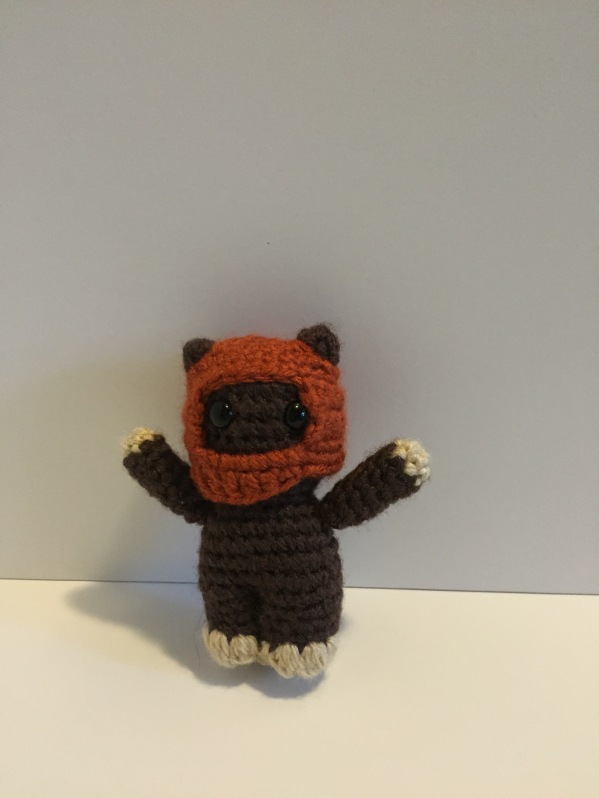
#25 Ewok

#25 Ewok

As you can probably guess, I am a huge Star Wars fan. I plan to make some of the others, but I would want them to have a light saber, so I am still working out how that will happen…

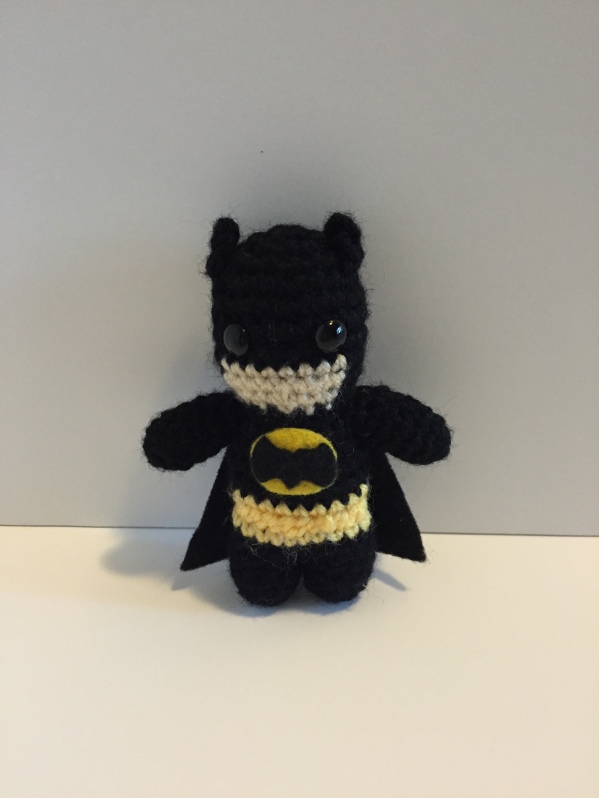
Finally, I also got really into watching the Justice League and Justice League Unlimited cartoons on netflix, so I am starting on making some of them. The first is a tiny Batman. He stands about 3″ tall, so much tiny and adorable! He is already sold as an addition to my dear friends classroom!

#26 The Batman

#26 The Batman

As you can see, I have been a busy beaver this summer, but not so busy with this that I did not take sufficient time to enjoy being off and stop to smell the so-called roses. Thanks for stopping by and enjoying my creations. You can bring them home with you via my etsy shop.
50 Amigurumi Summer Challenge

It is (almost) summer!! It is so close to the actual end of the school year, that my brain is already on summer vacation, at least on the weekends. Usually about this time I make a summer “to-do” list, just in case I get bored with my time off. I never actually do get bored, since I have staff development, summer camps, and conferences that I attend. I do have some free time, and I like to have goals and ideas to fill it. Also, lately, I have been re-inspired to crochet after taking a bit of time off from it. I have made 5 Amis in the last week, and I hope to keep that momentum going for a while. So, I am officially instituting the “50 Amigurumi Summer Challenge!” I am super excited about it! You can join in, or just follow along with me. I will try to post them with stories and captions here, and will also post on my facebook and my pinterest board, as well as on instagram, #50amichallenge.

I am really stoked about this, so even if you don’t join in, feel free to follow along and comment on what I make. If you join in, use #50amichallenge! So here are the rules:

1. Between Memorial Day and Labor Day, make 50 amigurumi.

2. Post pics and use #50amichallenge on any of your social media! Link back to this post to get others involved.

3. If you use someone else’s pattern, credit them for their work.

4. Have fun and be creative!

I look forward to seeing what everyone makes!

With that said- Here are the first five of my amis for the #50amichallenge!

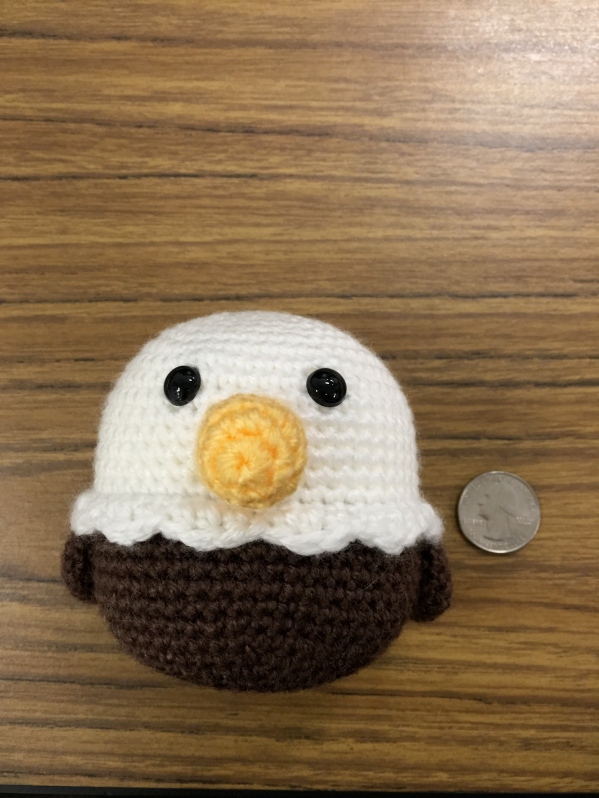
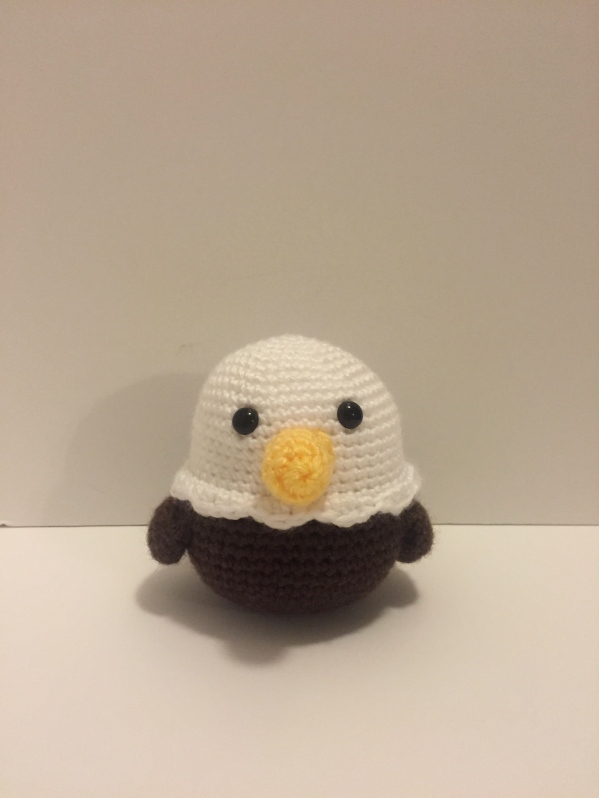
My school’s mascot is the Eagle! So, I made a couple of eagles to sell at the craft show in the fall. Here are number 1 and 2:

Eagle #1

#1 Eagle

The second one came out a little taller. Since these are a school mascot, I will probably make a few more, but I won’t count any more towards the challenge.

Eagle #2

#2 Eagle

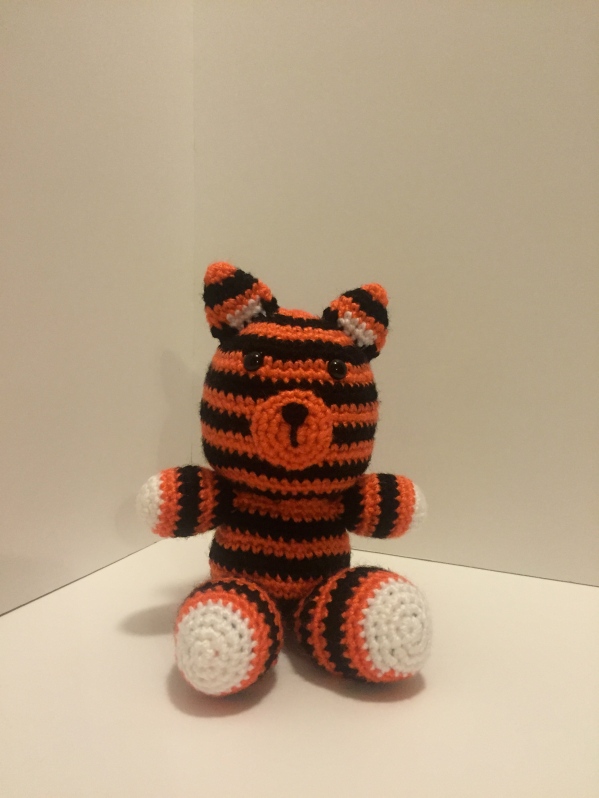
Then I made a cutie, big-headed tiger.

Tiger

#3 Tiger

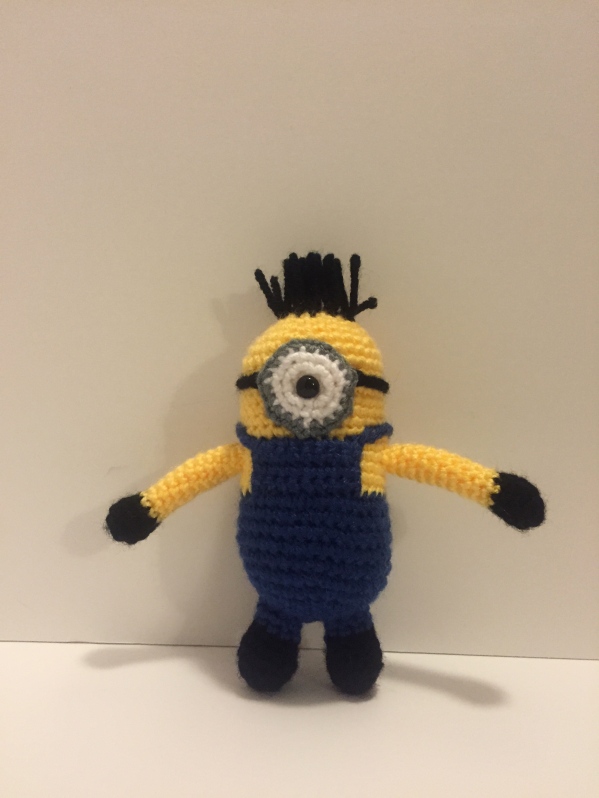
#4 is a minion from the movie, Despicable Me. They are freaking adorbs, and he will not be the last one of these I make! I love them!

#4 Minion

#4 Minion

The last of this group is a cute little baby chicken.

#5 - baby chicken

#5 – baby chicken

I hope you enjoyed the first of this series! What do you think? Also, what Amis would you like to see me make?

Fun Plushies

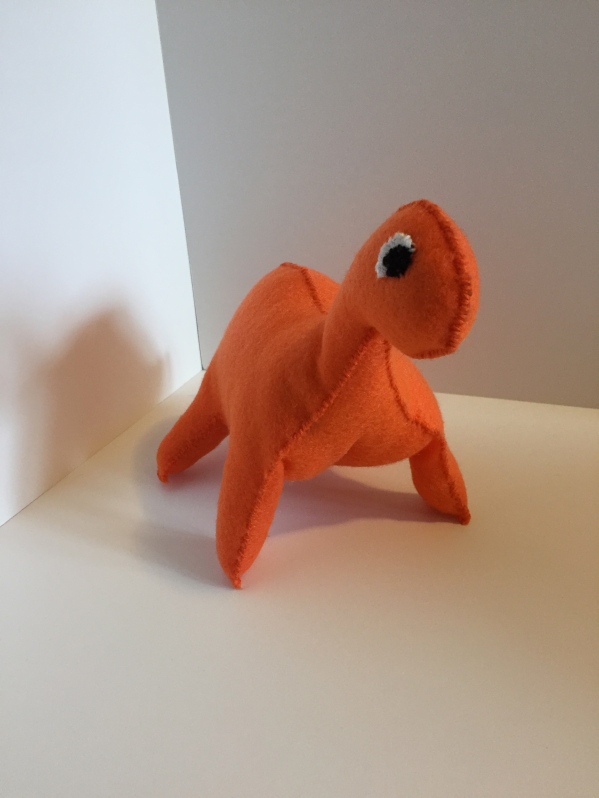
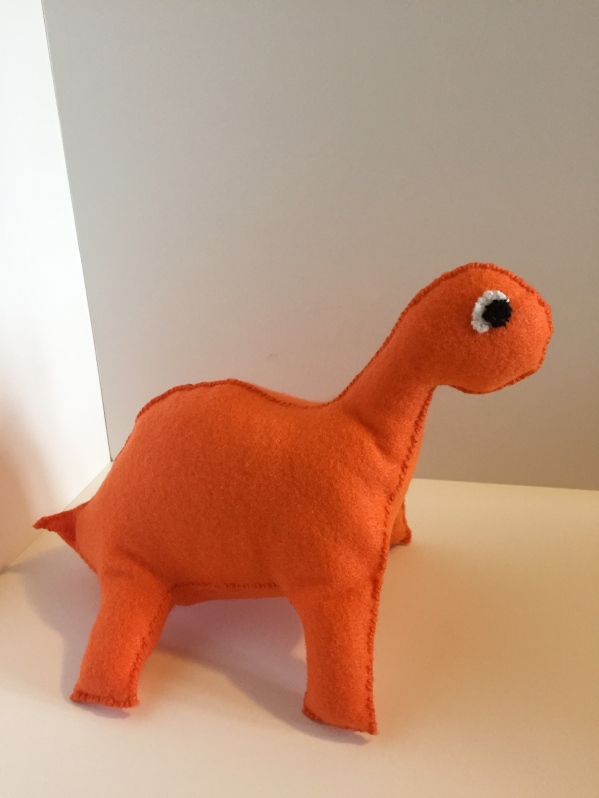
I have been experimenting with a new medium for my stuffed toys – fleece. It feels like I am making “real” stuffed animals. It started with my nephew’s dinosaur-themed first birthday party. I wanted to get him a dino book, and stuffed animal to go with it. I could not find a stuffed dinosaur that was a generic one (not associated with a movie or game). Plus, most of them were pretty scary, and well, he was turning one. I decided I would have a go at making my own, and it turned out very cute, and very one-year-old friendly.

First dinosaur

First dinosaur

I chose the color to match one of the dinos in the book. I think he turned out quite well. I hand sewed this one, which takes a long time (well, longer than a machine), so I decided subsequent attempts would be machine sewn.

Profile view

Profile view

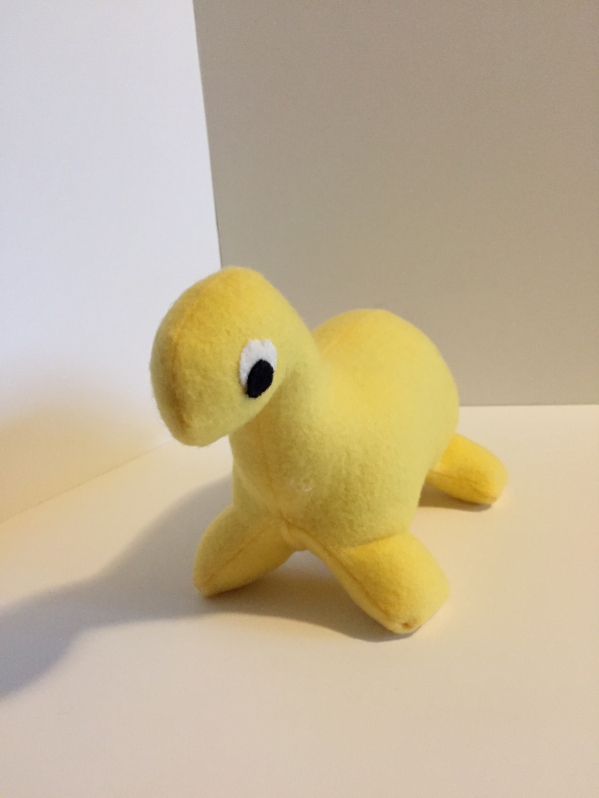
His eyes are sewn as well, since safety eyes should really be for ages 3+. My second attempt turned out a bit cuter, but maybe it is just because I prefer yellow, and the seams are hidden inside –

second dino

second dino

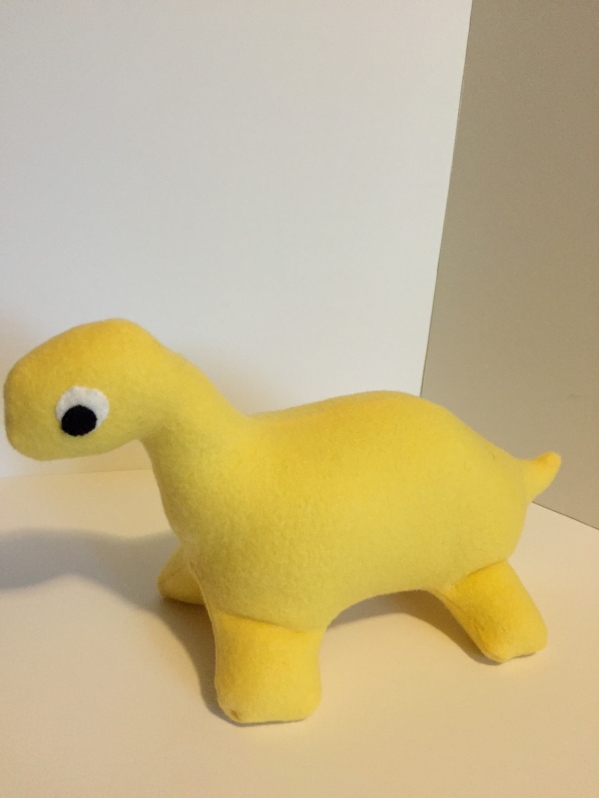
I also gave him larger eyes. I have a theory about the size of eyes being directly proportioned to the amount of cute something is. I made his tummy a bit thinner too, so his legs stand up better. I plan to make a couple more and tweak the pattern.

dino profile

dino profile

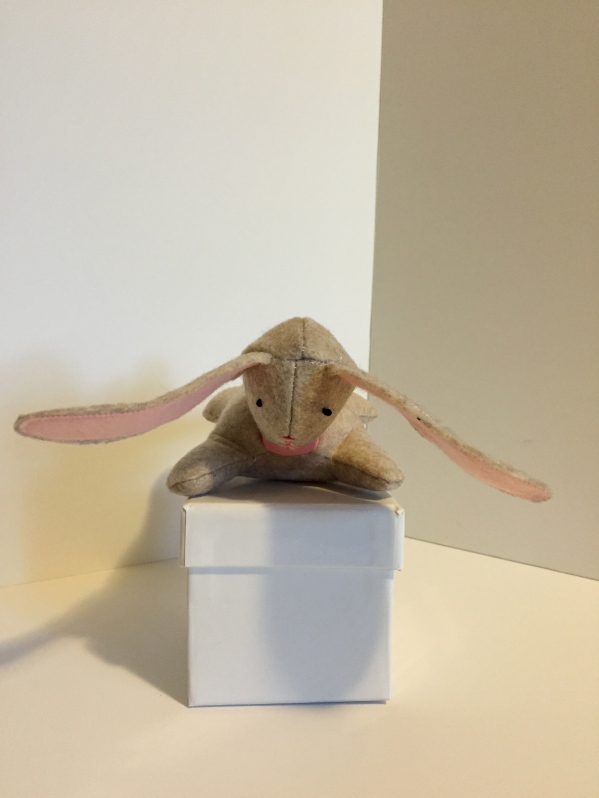
Of course, I try stuffed animals with my very own pattern first, and then do some research and find TONS of free patterns out there. So I decided to try a couple of them out. The first one is a bunny. It is a really good pattern, but I used felt instead of fleece, so his ears are a bit too large, and he is not as soft as he could be.

bunny foo foo

bunny foo foo

He is still quite cute, and his eyes are my first successful attempt at a French knot! I have been trying to master that one for quite some time! I had a bit of trouble following the pattern instructions, but I think it is due to my inexperience, rather than an issue with them.

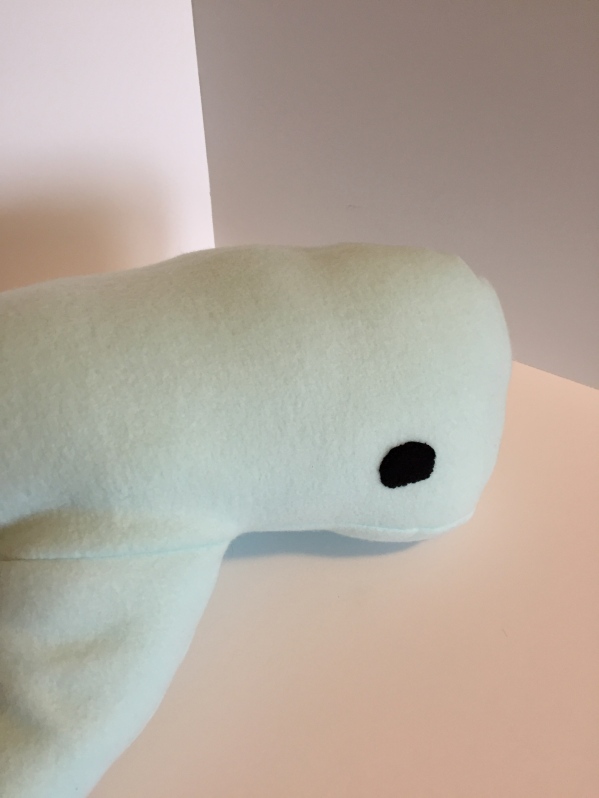
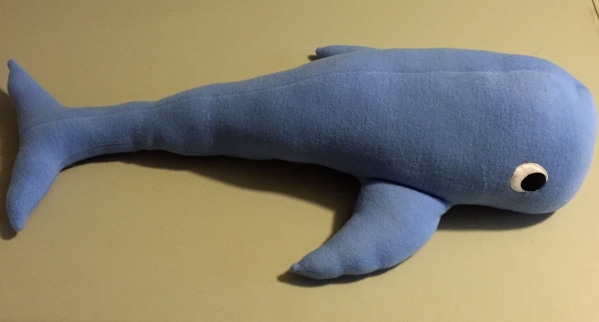
My next project was gigantic, too big even for my photo booth, but I did have a “whale” of a time making him.

Whale

Whale

Again, he is baby safe, and so squishy and adorable. You can make your own using the tutorial found here.

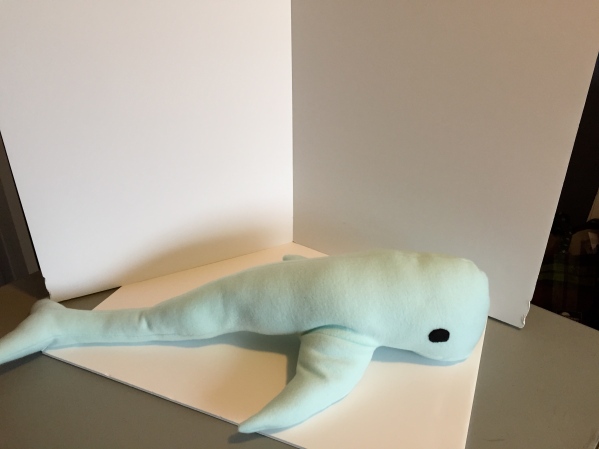
so big!

so big!

Those are 18×24″ papers – he is nearly a full yard long! I love his squish factor and size. Squish factor is a technical term, of course.

I also made him a rather large buddy in a darker shade of blue.

big blue whale

big blue whale

You may be able to see, he is taking up nearly half of a six foot table.

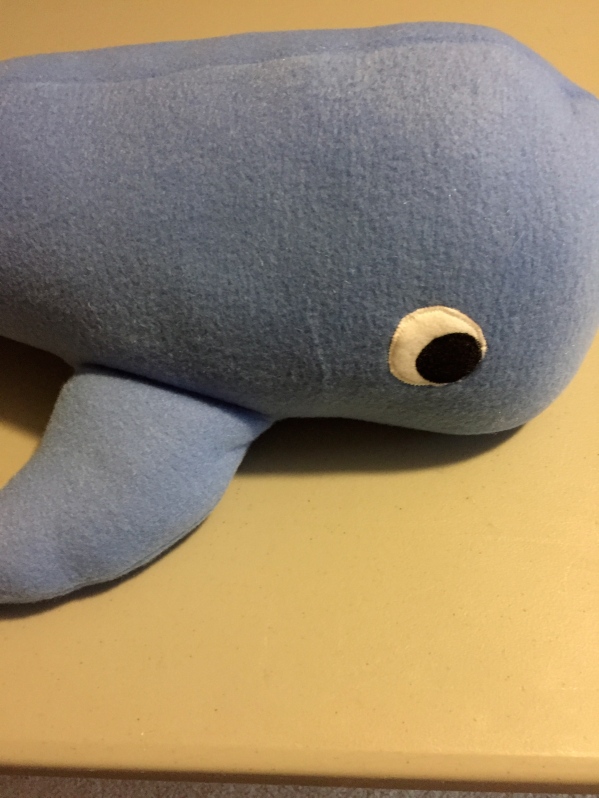
nice eyes

nice eyes

I love how his eyes turned out, very expressive.

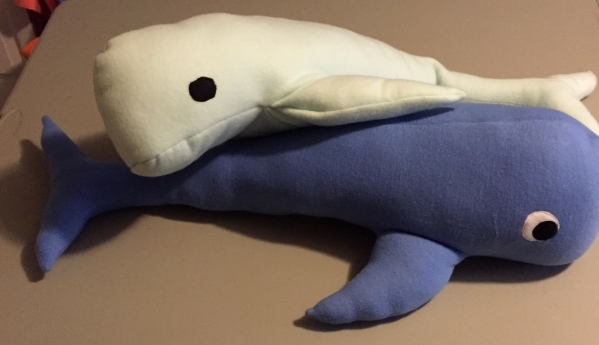
swimming buddies

swimming buddies

Here they are together. I am sure they will enjoy many hours of swimming together!

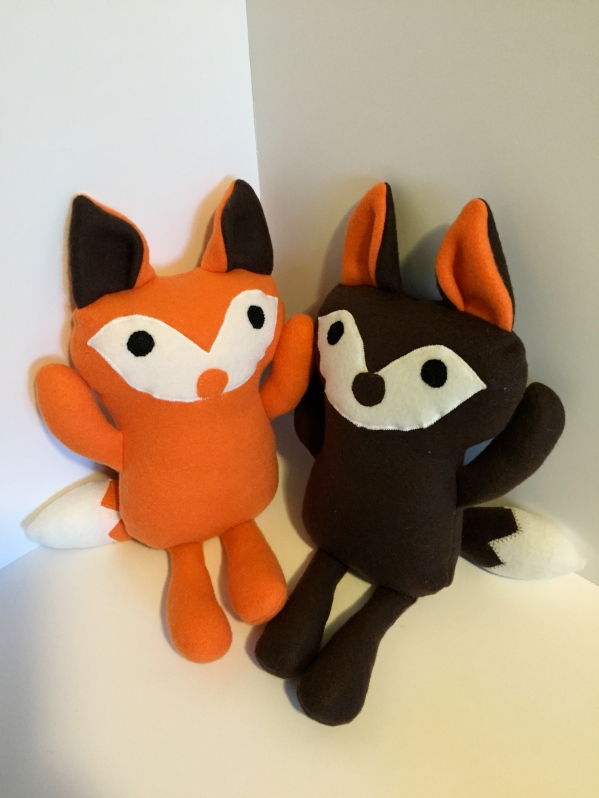
My favorite pattern I have made as part of this experiment has to be the foxes I made using this pattern. It is adorable, simple, and yet doesn’t look too simple. I am thinking about ways I can adapt this pattern to different animals – maybe a dog, cat, elephant? Who knows?

Best Friends!

Best Friends!

They are so cute, and I imagine they are best friends!

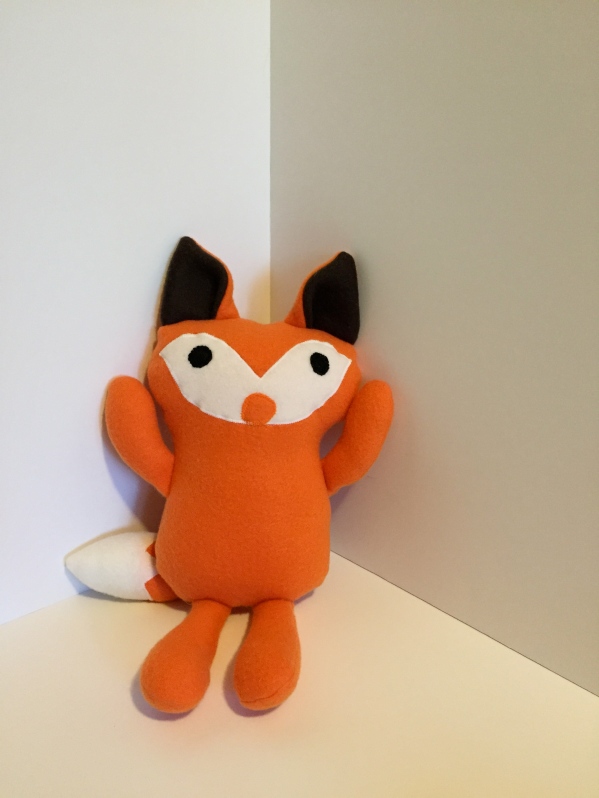
Orange fox

Orange fox

I really got quite a bit of experience with the applique setting on my sewing machine doing their faces. I decided to make them complimentary in color.

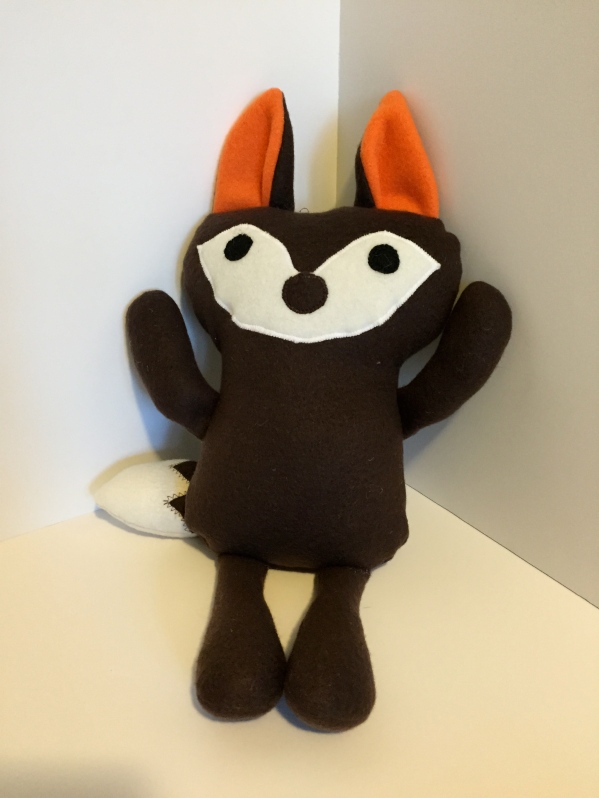
Brown Fox

Brown Fox

I think they both turned out quite cute. I am very pleased with this little experiment, and I am sure there are lots more to come. I just love working with new things and learning about new crafts. Ever since, I have picked up every stuffed animal I see (dog toys included) to examine their construction. Just like amis, they are basically a combination of simple shapes. I love to see simple things that work together and make a very complex whole. I hope you enjoyed this small stuffed menagerie.

My First Quilt

I finally finished my first quilt. It was quite a bit of work along the way, but as soon as I put the binding on and it came together, all the work was well worth it!

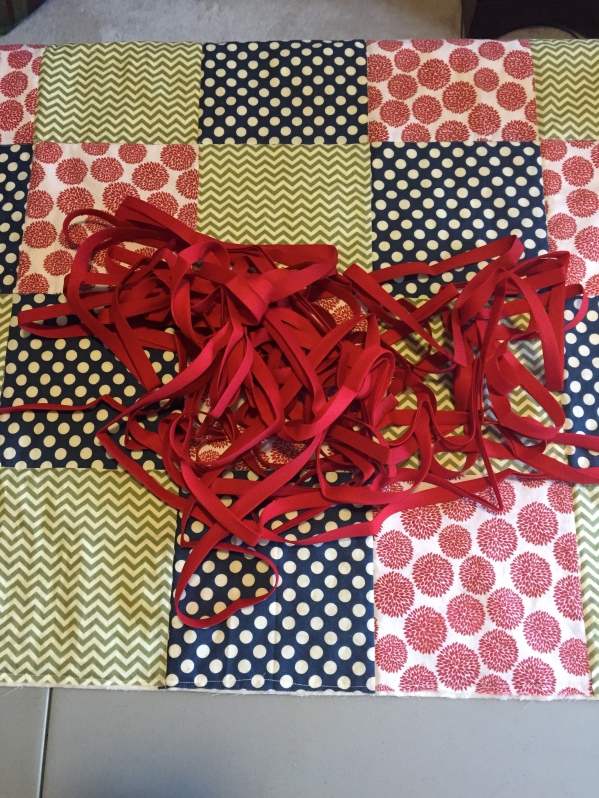
We had President’s Day off school. I had just returned from a long, but amazing music educator conference, so I needed a craft project to fill the day. I had already sandwiched my quilt, twice (see this post for details on that learning experience), and it had been sitting, folded neatly, waiting, since then. I declared it quilt finishing day! I gathered all my materials, and got to work. I sewed all my purchased bias tape together to create the binding. I had a slight miscalculation (3 yds = 9 ft, not 3 ft, oops!) in my binding needed, I now have about 90 extra feet of red bias tape. I guess I will have to find some good use for that, any ideas? In the future, I may try making my own binding for the quilt.

bias tape for days

bias tape for days

As soon as I pressed and pinned the binding to the quilt, I started to get very excited. It really looked like a quilt now, and not a bunch of raggedy squares sewn together, slightly haphazardly. I texted DH with a pic of the binding pinned on, with many exclamation points attached to convey my enthusiasm.

coming together with pins

coming together with pins

I watched about 7,000* tutorials on how to sew on binding, how to do mitered corners, and generally how to finish the quilt, and then I finally started to feel confident that I could in fact handle this project.

* so maybe it was just 5 or 6 videos

* so maybe it was just 5 or 6 videos

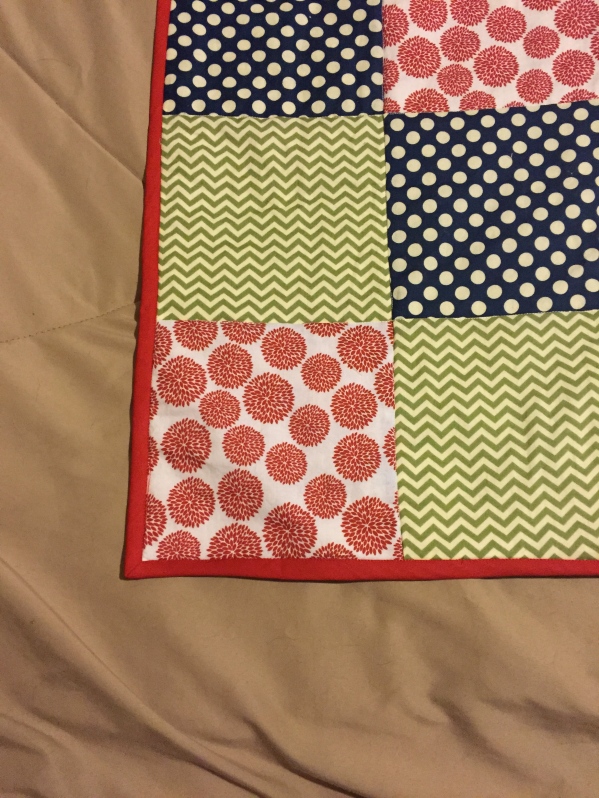
The corners turned out great, very clean looking.

mitered corners ftw!

mitered corners ftw!

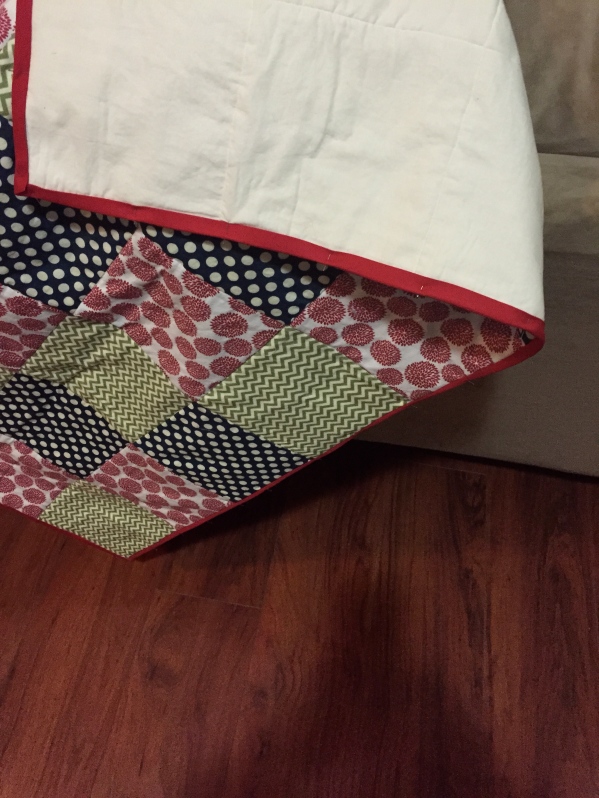
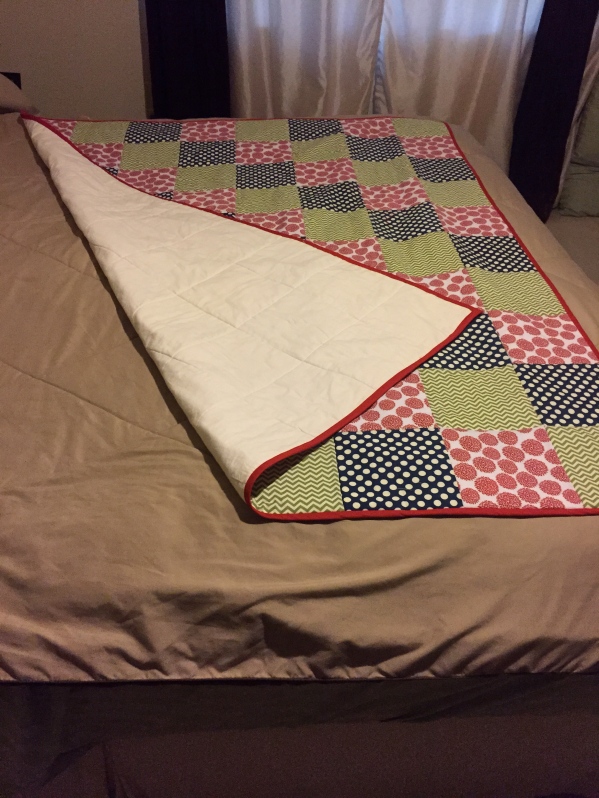
The process took most of the day, and slowly but surely, I sewed each side on the front. Then I pressed and pinned and stitched in the ditch to tack down binding on the back. It looks really great. I had only one place where I did not catch the binding on the back but I was quickly able to hand sew and fix that at the end.

front and back

front and back

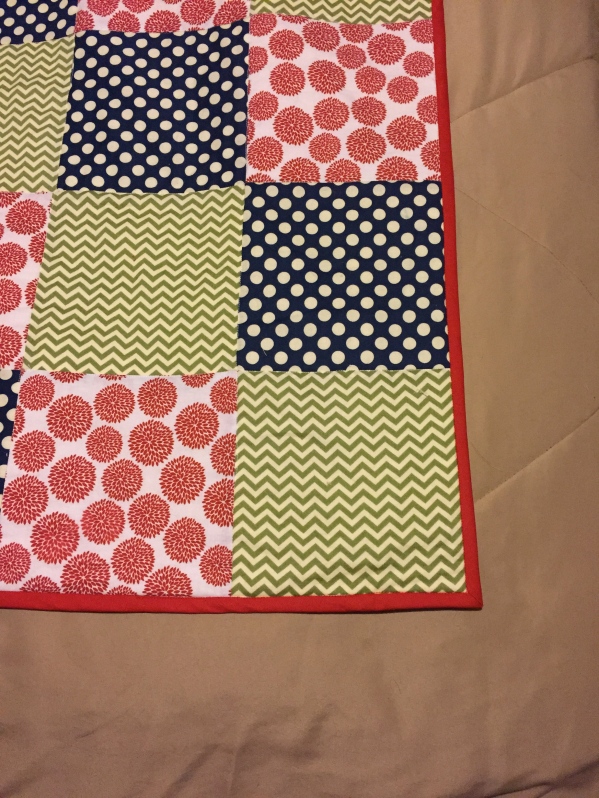
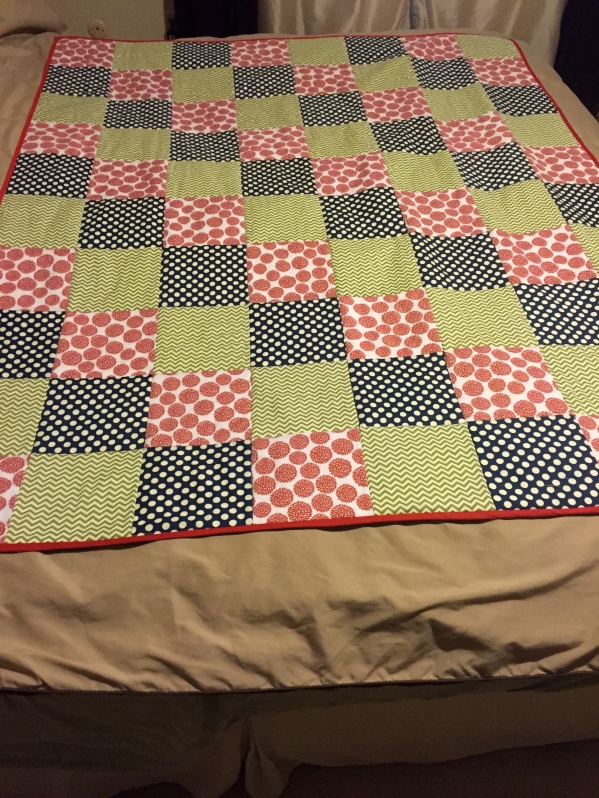
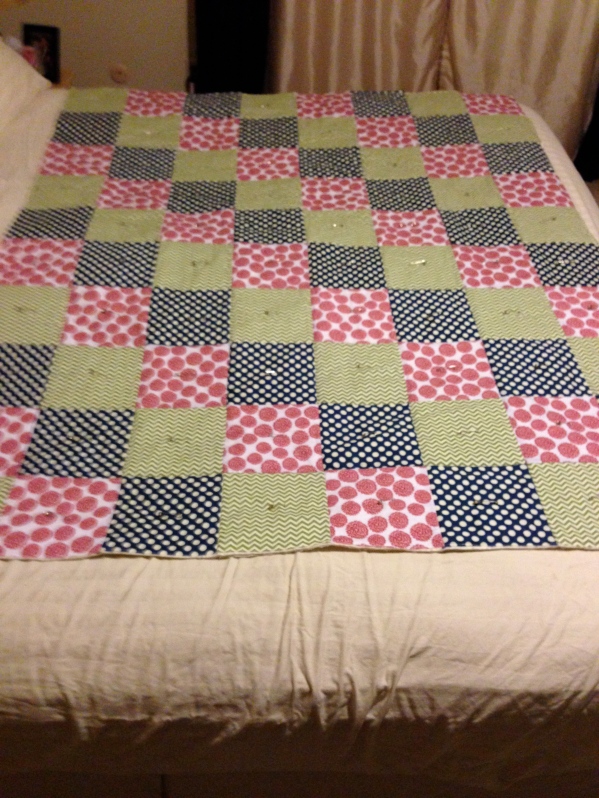
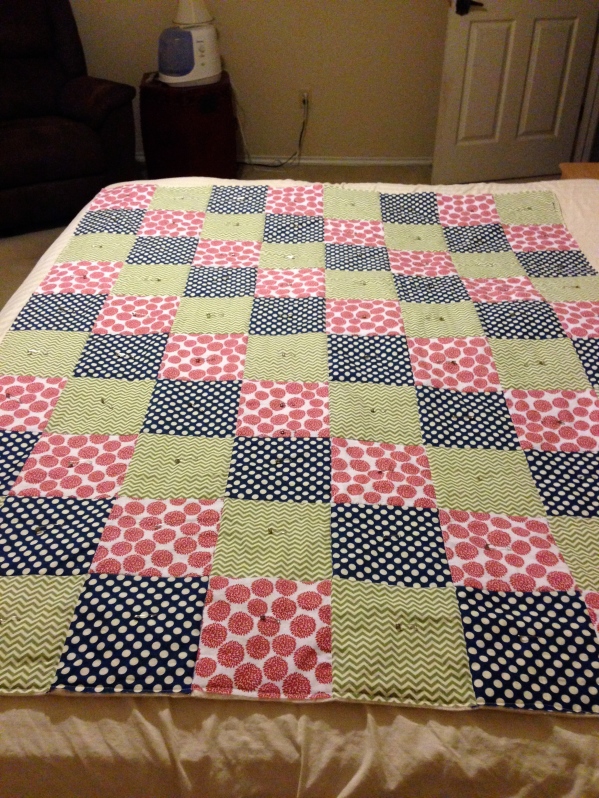
It is a lap size blanket, and it is very light weight.

quilt laid out on king size bed - for perspective

quilt laid out on king size bed – for perspective

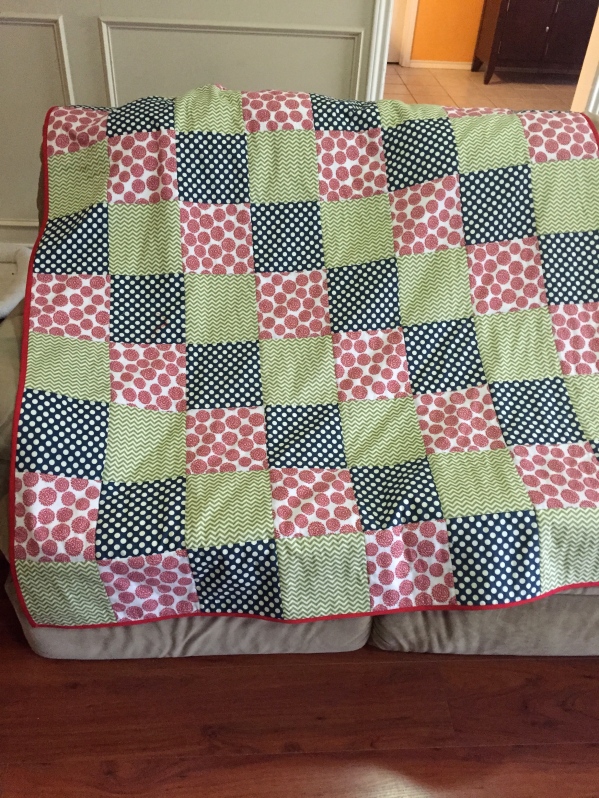
Here it is in its more permanent home, the couch. I have used it every night since I made it. Since it is still Winter, I have had to use another blanket with it. It is not that warm, because I used cotton batting, but will be just the right thing for Spring evenings.

couch blanket

couch blanket

I am really proud of it, and have learned a lot while making it – not just about how to make a quilt, but about being a more confident sewist, sewer, (what is the right word here?). Even though I was nervous about several of the steps along the way to finish this project, I researched the steps, took my time, and really thought through each bit. As I planned out each section I took comfort in knowing I could rip out stitches if they were not right, and although that can be disheartening, I tried not to let it get me down. I did not put a deadline on this quilt, but allowed it to be finished in its own time, which helped make it a very low stress project. I am excited to add this craft to the list of things I enjoy.

Thanks for checking it out, and I welcome any suggestions and ideas for how to use up 90-ish feet of bias tape below 😉

Recent projects

I have been quite busy crocheting up a storm the past couple of weeks. Some things have been special orders, and others are because I am working on having more inventory for my etsy shop, other things are just for fun, just for me. I am still working on it. I hope to have several items posted by the end of this month! Before I post items there, I wanted to show them off here first!

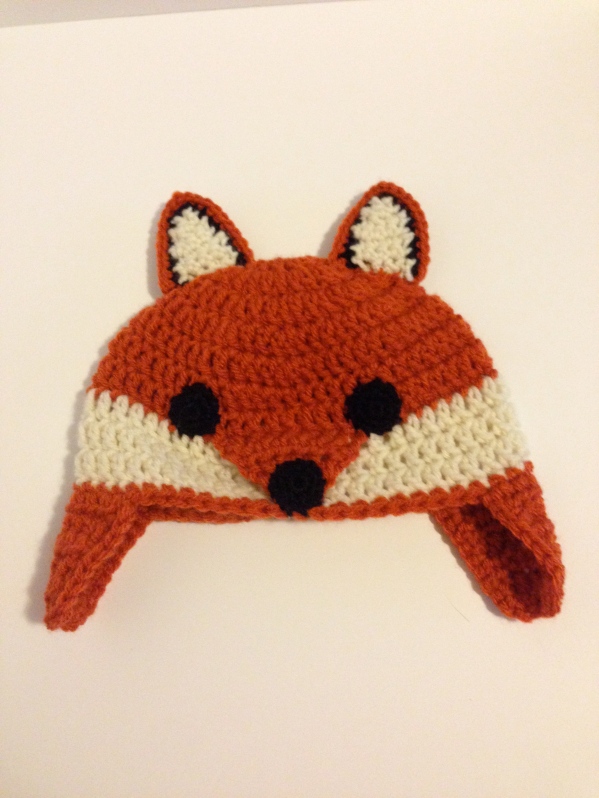
Here is a cute little fox hat I made for a friend of mine. I really need to make some more of these, they are so stinking cute!

Cute little fox hat

Cute little fox hat

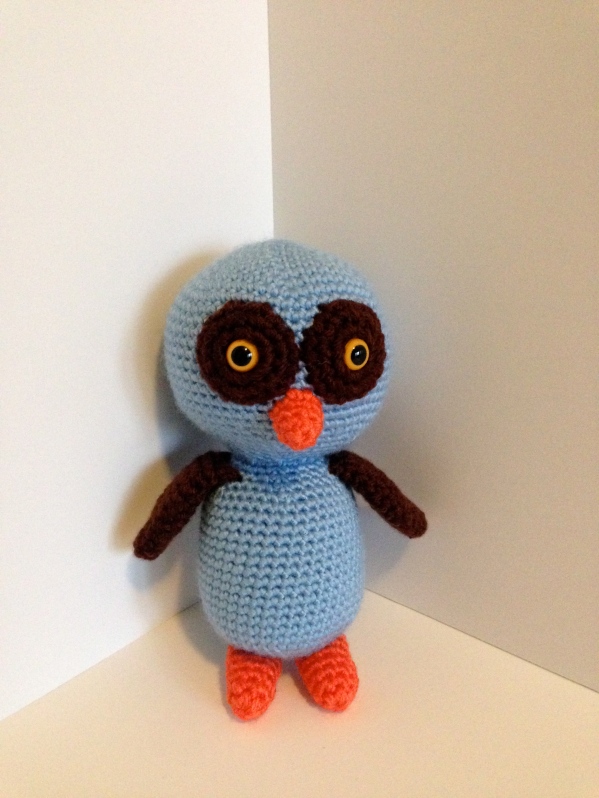
I made this owl for a friend who needed a gift for a baby boy. She requested brown and blue for him. I think it turned out adorable.

Owl for baby boy

Owl for baby boy

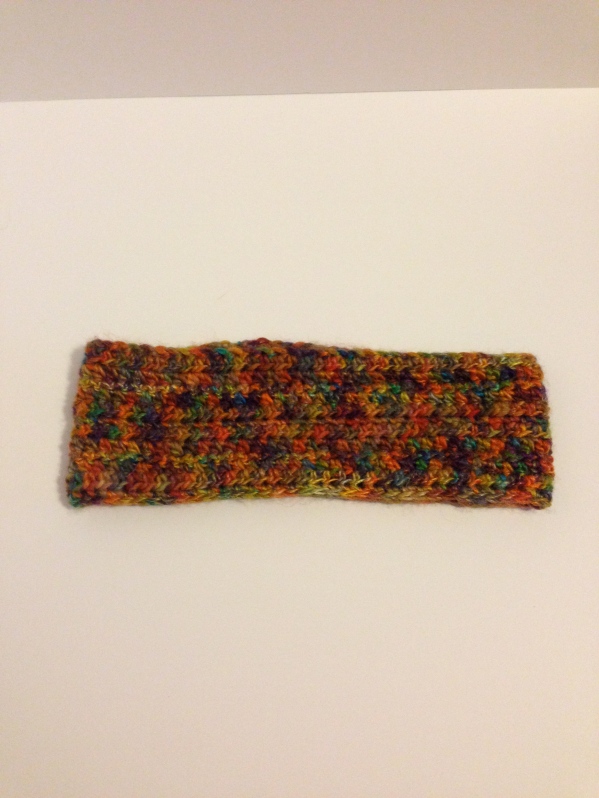
When my husband and I went to Chicago last summer, I went to a local yarn store and bought some beautiful yarn. I have been holding it for a while, trying to figure out the perfect thing to make with it. While I haven’t figured out what the perfect thing is yet, I could not wait to make something. We have had some really chilly mornings here Texas, which means super cold ears while walking my dogs. Since this is wool, I made a headband/ear warmer to wear on those chilly morning walks! It is a simple single crochet stitch, but the variegation in the yarn makes it looks super elegant. I love it!!

Chicago yarn headband

Chicago yarn headband

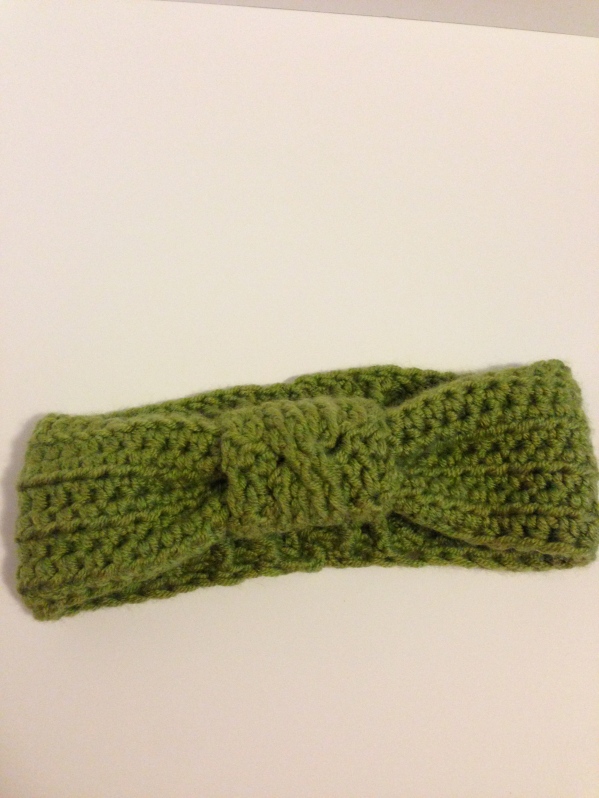
While I was on a headband kick, I made another one from some really thick green yarn. It turned out really cute. I did a faux bow in the front by gathering and wrapping the front with a small piece.

Warmer front

Ear warmer front

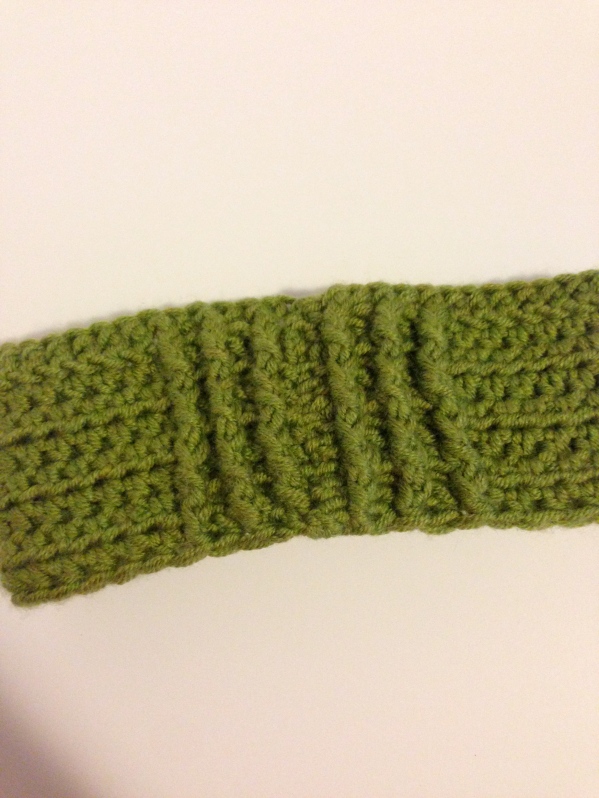
On the back I did some front and back post stitches to create a bit of a ribbing to allow it to expand so it would fit snugly around my head.

Ear warmer back

Ear warmer back

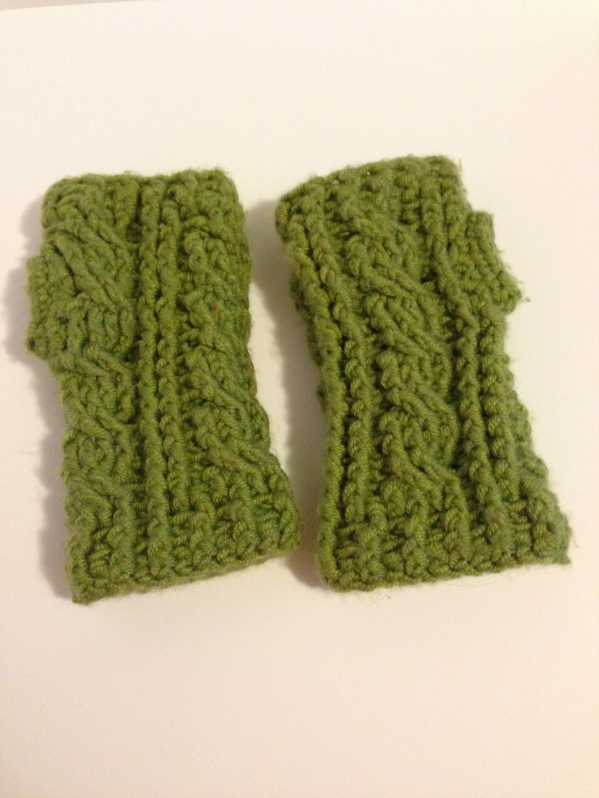
From the same thick yarn, I made some cable crochet hand warmers. They are so cute, and very warm! I use them almost every day.

cable crochet gloves

cable crochet gloves

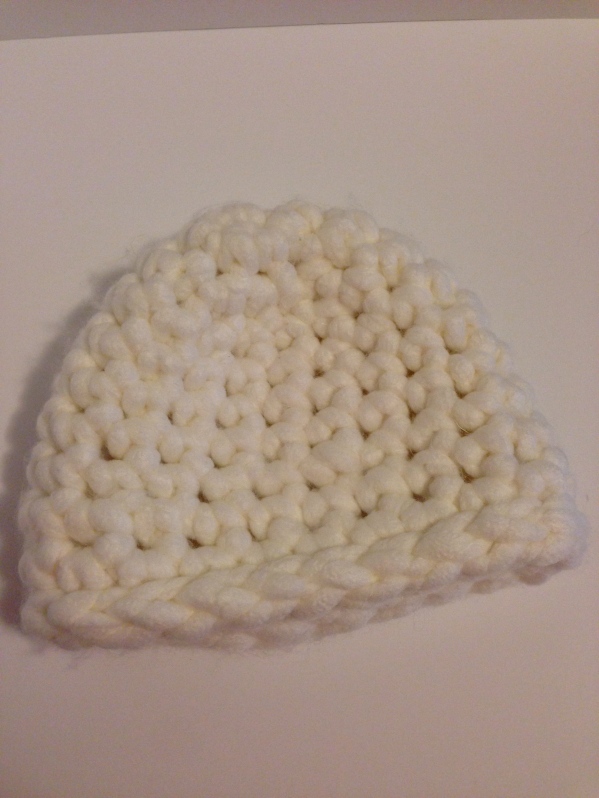
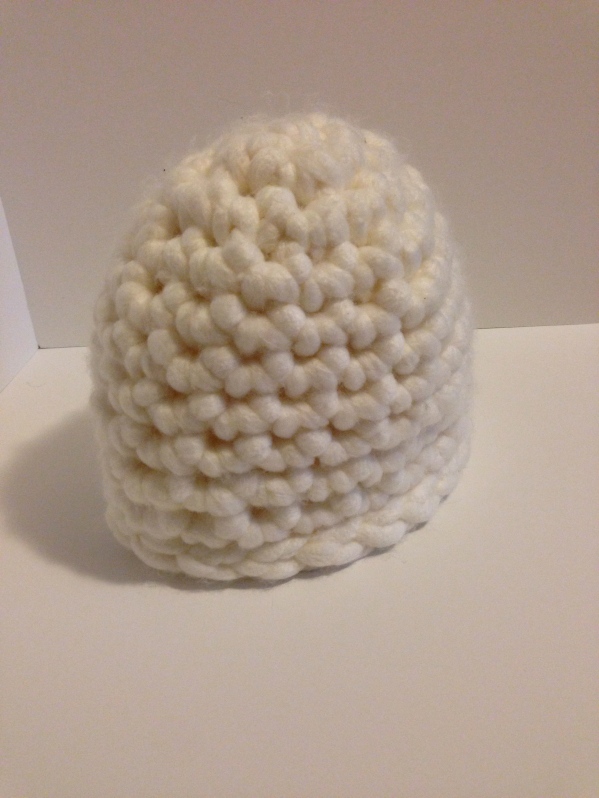
I found a super bulky white yarn, and I made a little hat out of it. It is the perfect size for a woman or a teenager. I will put it up for sale after I get a picture of it on an actual person 😉

IMG_2841 IMG_2842

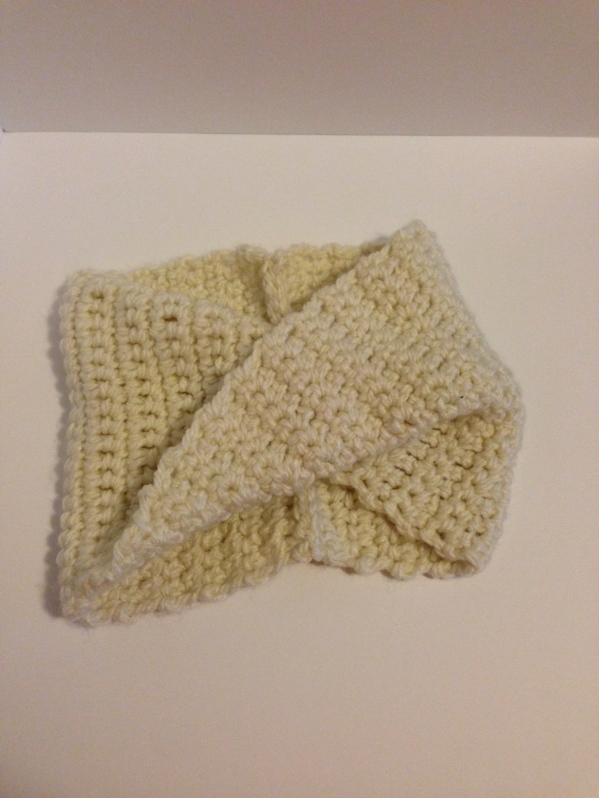
I also made this twisty cowl from a thick, wool yarn. It is super cozy and comfy, and once again, I need a model for it before I post it in the shop. I have a couple of volunteers for the model position, lol, we just need to match up schedules. I love it because it uses a new stitch I discovered, the extended single crochet!! It has been so long since I found a new stitch and I immediately am enamored of it! Anyway, this particular cowl is made from from alternating rows of single crochet and extended single crochet. I made a long block, and then twisted it and sewed it together. I love the look of it, and it is really warm.
Cowl

Cowl

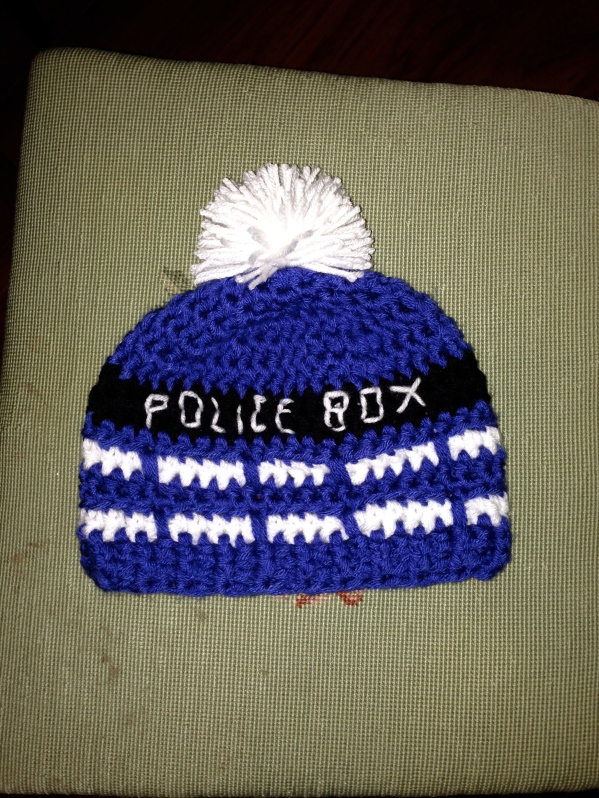
Last one – a Doctor Who TARDIS inspired hat. I am really happy with this one. I used two strands of each yarn throughout. The pom pom is made to look like the light on top. I embroidered the words “POLICE BOX” onto it, and I think it looks pretty good. Yea, Doctor Who!
TARDIS hat

TARDIS hat

Thanks for looking and allowing me to share this with you! I hope you enjoy them as much as I enjoyed making them!

Quilt progress

I am sooo excited about this quilt I am making. One of my craft goals this year is to try some new crafts. I want to explore crafting options, trying to keep it fresh. So this month has been a quilty month. I shared the first step – the quilt top making – here.

I basted it the first time shortly thereafter, but I did it on carpet and it created several huge wrinkles in the back. I was defeated, and set it aside to regroup. Last Sunday, I rebasted it in the living room, where we have wood floors. My DH was very helpful when I was laying out the backing, and our two wonderful puppies tried very hard to help as well. They are not as helpful as they want to be 😉
It worked-no wrinkles!

Basting party

Basting party

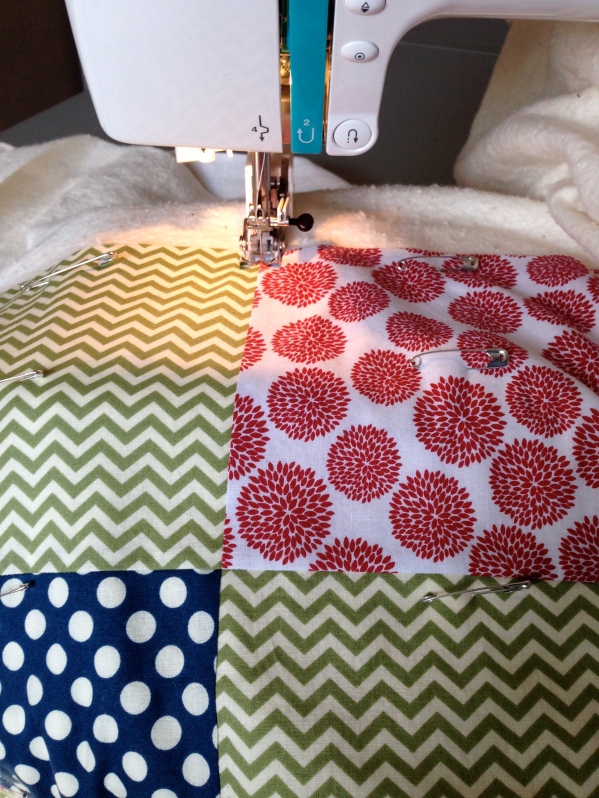
Today, I had some free time, so I decided to go for the quilting! It took several hours of very slow work. I had to fold and roll it strategically to fit it in my machine. I don’t think I would have the patience for hand quilting, although it looks amazing!

Ready for quilting

Ready for quilting

It was not tedious work, exactly, but it did require quite a bit of concentration. At one point, I had to stop and make buffalo wings for the game today, but then I went right back to it. Now it is quilted, and looks great. I trimmed the excess off, and it is ready for binding! I will try to get to that this week, or maybe next weekend.

Ready for binding

Ready for binding

Quilt ready

Quilt ready

I am thoroughly enjoying this process and learning how quilting works. If you are going to try it, I recommend a smaller project to try first. At first, I thought this would be the only quilt I ever made. Now that I have gotten the hang of it, I might do this again – I do have quite a few scrap fabrics…

WIP to share

Today, I have a rather large project I am working on to share with you.

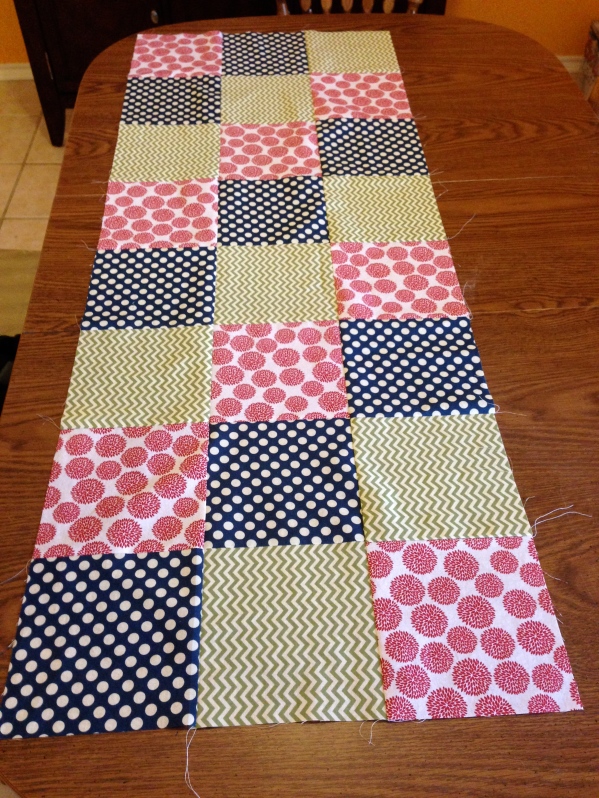
I am trying a new craft-quilting! So far, it has been pretty easy. I have made smaller quilted items before, and I took a quilting class at our local craft store with my mom a while back, and it was pretty fun. The block we made was far too complicated for me at this stage, so I decided to make it a little simpler. For my quilt, I took 7″ squares in fabrics I really like and sewed them together to make the quilt top.

Beginning of quilt top

Beginning of quilt top

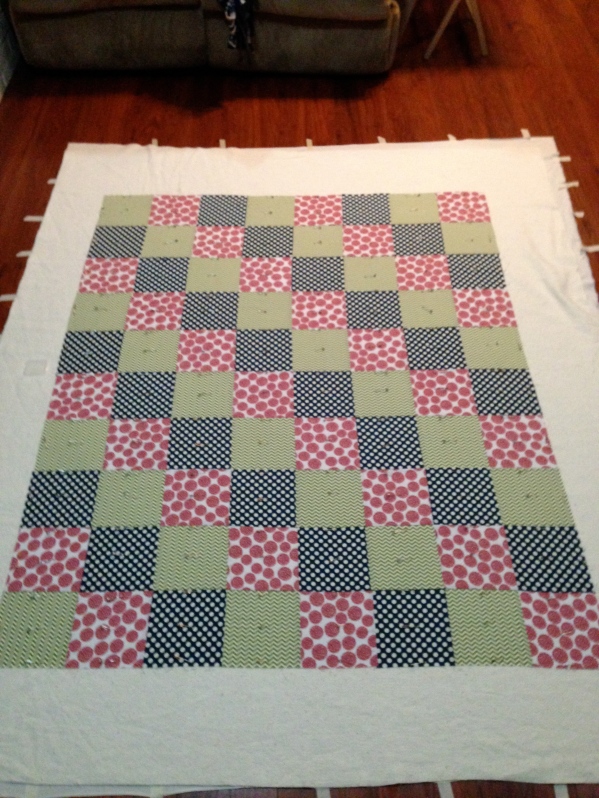
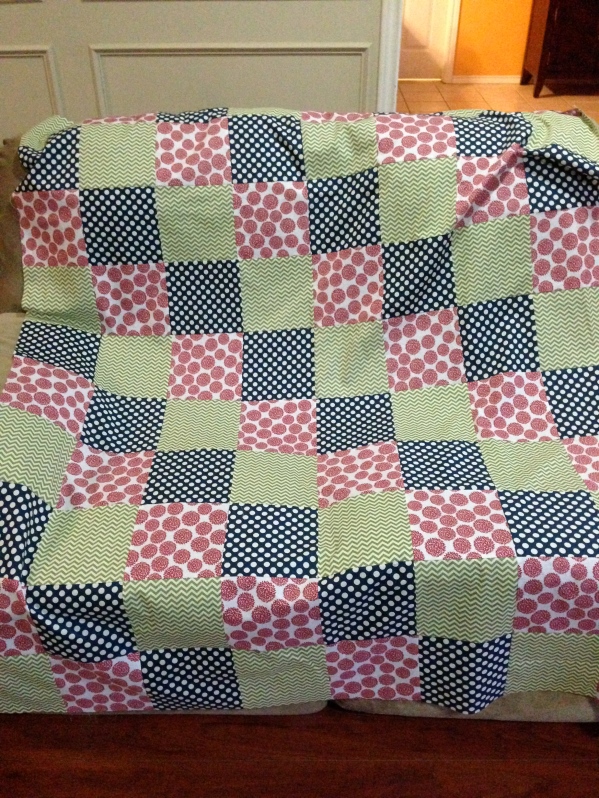
Why 7 inch squares, you might ask? Well, because I confused perimeter and area when I was trying to figure out how large to cut each square. I was thinking 6 inch squares, with 1/4″ seams, and well, mathed it out in my head, and, well, it did not quite work out. It does not really matter, though, as long as they are all the same size. I eventually got them all sewn together and I have 8 columns and 10 rows. It is HUGE!

Quilt top finished

Quilt top finished

I like how it turned out, and I am looking forward to the finished quilt. I am not looking forward to the next part, sandwiching and quilting. I am a bit nervous about it, worried that if I mess it up, all that hard work would have been wasted. I will get brave (hopefully soon), and begin work on the next steps. Maybe even later today 🙂

Wrapping Up the Holidays

Happy New Year, everyone!

I love the idea of the new year being a time to set goals, get organized, and get a fresh start. As my DH and I go through the closets and the house, cleaning and donating anything we don’t use or need anymore, I am reflexive about the holidays. I had a great holiday this year, and want to share with you some of the things I am doing to reorganize, and especially some of the crafts I made over the break!

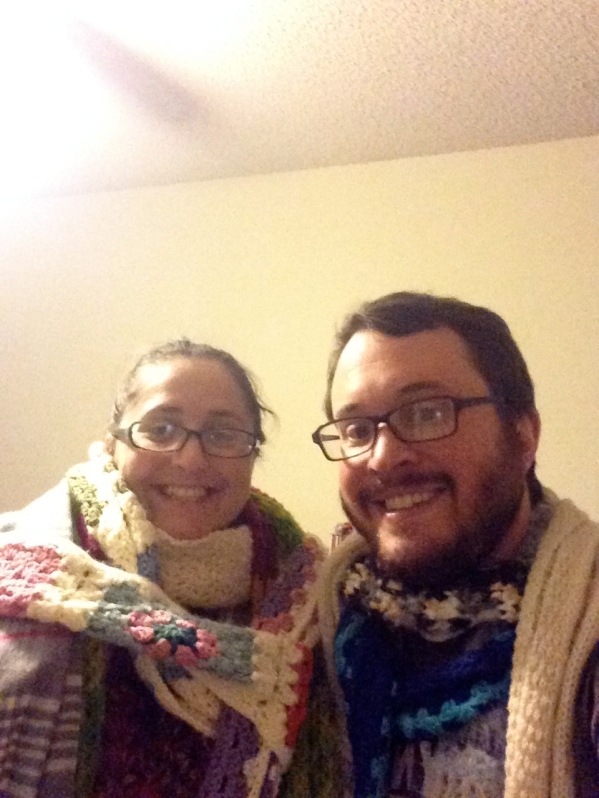
Here we are wearing all the scarves that were hanging on the coat rack I cleared off. I donated a few, but kept most of them (I get really cold!)

Wearing all of the scarves!

Wearing all of the scarves! #Scarfie

I made a batch of freezer meals for those nights when cooking just seems impossible. I am going through my craft stash and organizing. All of the Christmas gifts are given, and so I put away the monstrous pile of yarn and fabric I had out to finish everything. That took almost a whole day. The house feels fresh and clean with the clutter of holiday decorations now gone. I am not under pressure to fill orders that were needed by December 23 AT THE LATEST!!! (that is a direct quote from a customer, lol), so, I can craft at my leisure. I do still have a couple of orders to fill in the next week or so, but they are not high pressure. I will start and (hopefully) finish them this week.

I did not take too many pictures of the gifts this year, but will share what I have 🙂

Here is a TARDIS inspired hat. I will make a couple more to troubleshoot the pattern, and then hopefully share it here.

TARDIS

TARDIS

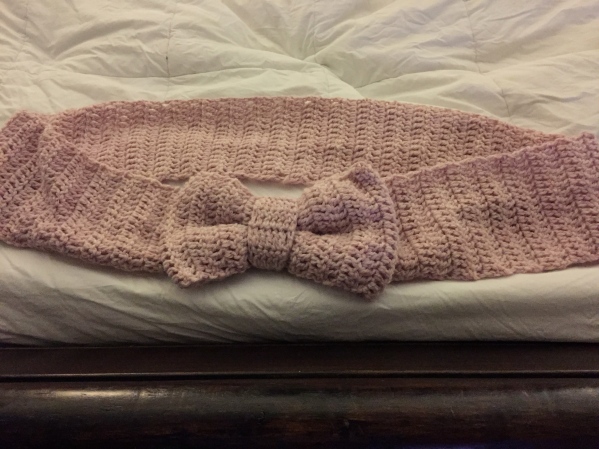
I also made this really cute bow scarf for my sister. She really liked it, and, thankfully, took a picture of it after Christmas so I could share it with you. The pattern for this one is not my own. I got it from the ladies at Top It Off Threads. They are on Facebook, and make really cute stuff. They graciously shared their pattern for this scarf when I met them at the craft fair last October.

Bow Scarf

Bow Scarf

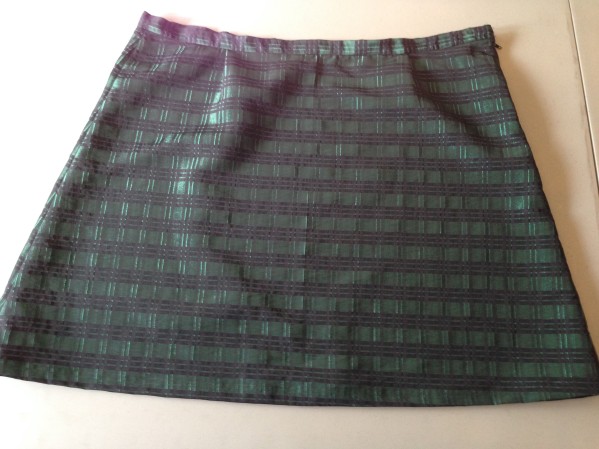
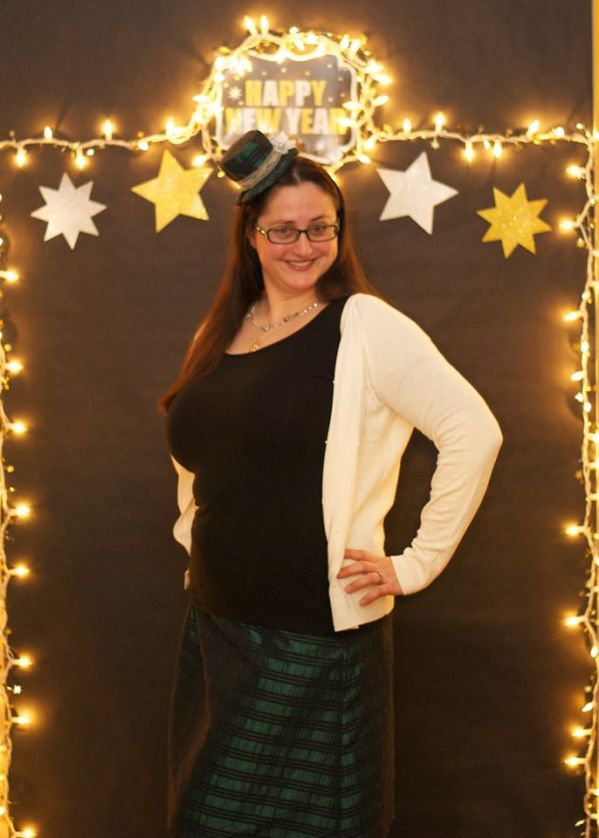
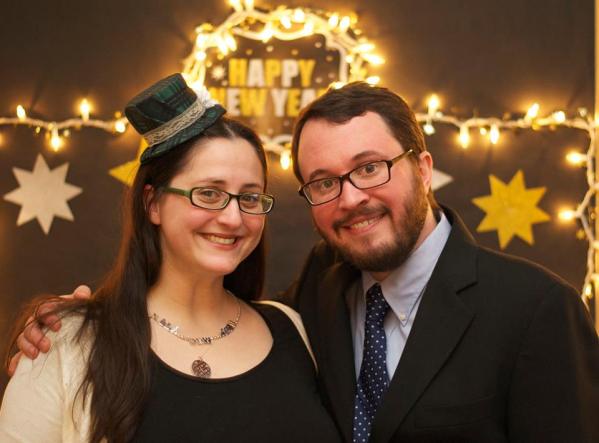
My friend had a fancy dress party for New Year’s Eve, and it was loads of fun! There was music, great food, fun games, and even a photo booth!  I made the skirt I wore to the party, and I am really proud of how it turned out.

NYE skirt

NYE skirt

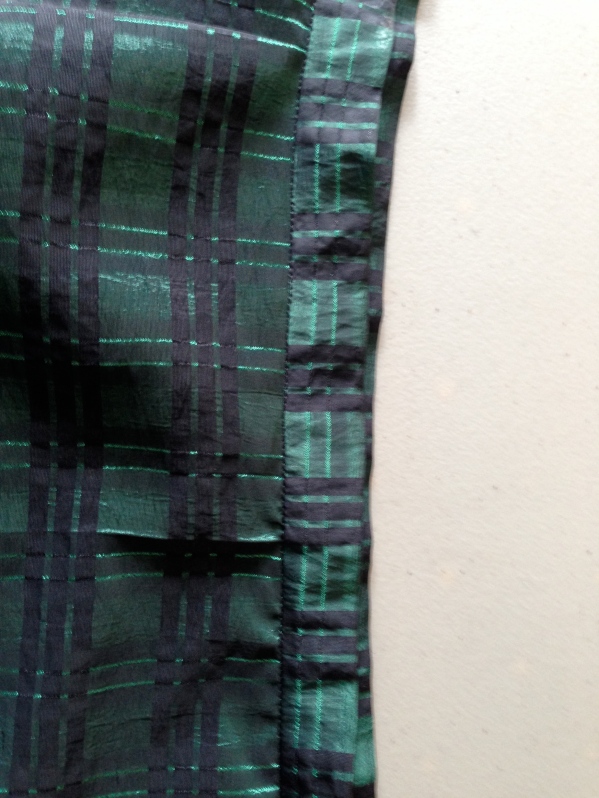
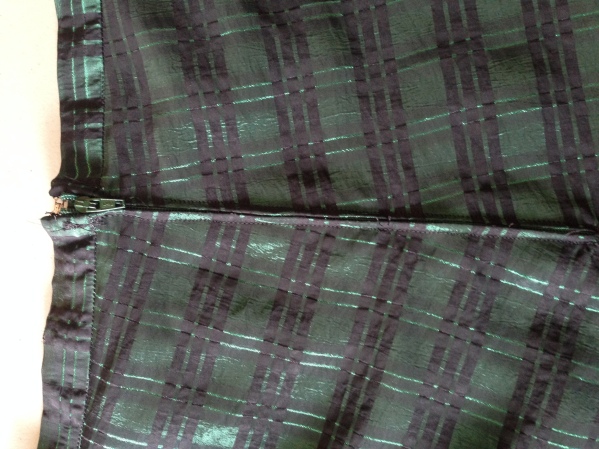
I successfully stitched in the ditch, inserted a zipper, and added a hook and eye.

Stitch in the ditch!

Stitch in the ditch!

zipper/hook and eye

zipper/hook and eye

Since it is a plaid, I lined up the pattern. It always bothers me when the pattern does not match on ready to wear clothes. It is just a basic A-line skirt, but the fabric drapes really nicely.

NYE

NYE

I was also very careful when doing the hem to make sure the fabric lays flat on the right side. It is not a perfect fit, because I am still not sure how to properly figure ease, but I think it turned out just fine. I really like it, and will definitely wear it again! I also think we definitely rang in 2015 with style and class!

Happy New Year!

Happy New Year!

2014 holidays have come and gone. Food and gifts were shared, laughter and merriment ensued, and a good time was had by all! I really tried to enjoy every moment of this break, and with such great family and friends, it was easy. Thank you, kind readers, for sharing 2014 with me, and for your continuing support. I look forward to another year of sharing with you all and being inspired by you. Have a happy and healthy New Year!

2014 in review

WordPress offered me a summary of my blog for 2014, which is highly appropriate as I am working on ideas for crafty goals for 2015! If you are interested in how the blog is growing, here are some stats and figures!

The WordPress.com stats helper monkeys prepared a 2014 annual report for this blog.

Here’s an excerpt:

A San Francisco cable car holds 60 people. This blog was viewed about 2,400 times in 2014. If it were a cable car, it would take about 40 trips to carry that many people.

Click here to see the complete report.

Staying Organized This Holiday

The holidays are an extremely busy time of year for everyone. Personally, I have more to do in December than just about any other month. For school, I have evening concerts, elementary tour, assemblies, sing along, final exam and review, and we begin music and prep for our most intense concerts of the year. For myself, I always take too many gigs because I love to play, so every evening and weekend is filled with either a rehearsal or a performance and somedays both! It is also the busiest time for Lou’s Labors between custom orders and regular orders from my etsy shop! When school finally ends for the semester (this Friday!!!!), I can start thinking about and planning the multiple family holiday celebrations we do each year.

I love each and every one of the things I do at the holidays, but it really takes some work to stay organized and keep from being overwhelmed! Sometimes I do really well, sometimes I cry because of the lack of good night’s sleep, but my goal is to try to thoroughly enjoy each moment of the holidays. I know that I am incredibly fortunate to be able to do so many things and share my musical gifts, and have such an amazing extended family with whom to celebrate this time of year.

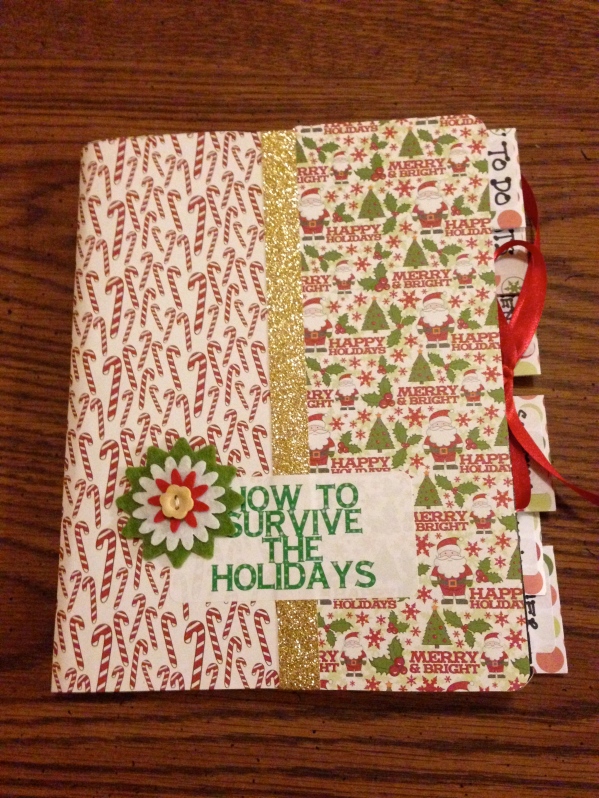
So, what is a crafty girl to do? Make a holiday organizer, that I dubbed a “Holiday Survival Guide,” of course 😉 !

I was looking at Pinterest over Thanksgiving Break, and I found the greatest idea – a homemade holiday planner! Jen, from Eighteen25, is seriously creative and made some fabulous printables. You can find the link here.

Holiday Survival Guide

Holiday Survival Guide

I followed her tutorial, but this year’s printables were not my favorite color palatte. I had about a million sheets of holiday paper from other crafts, and I always have tons of labels (teacher, remember), so I made my own set.

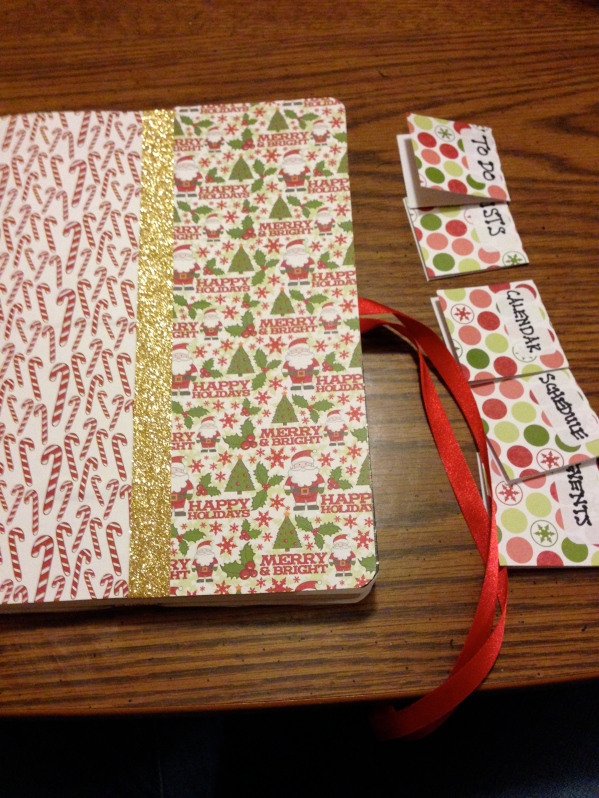
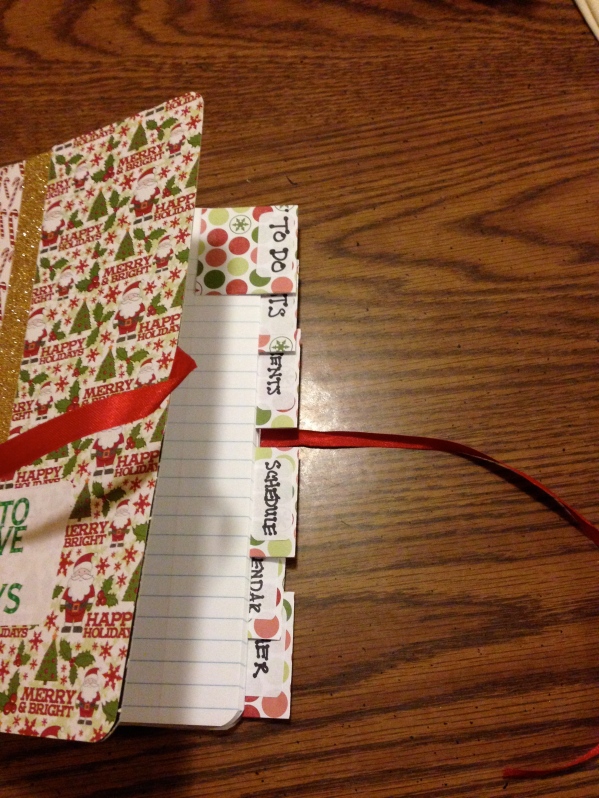
It was simple to make and really took no time at all. I traced the cover of a composition book onto scrapbook paper and glued it on using paper mod podge. I let that dry and then covered the seam with a sticky glitter ribbon. I cut out the tabs and attached them at several intervals in the book. I used small labels and Sharpie markers to make them. They say “TO DO,””THE LISTS,” “EVENTS,” “SCHEDULE,” “CALENDAR” and “OTHER.” It has been extremely useful, and you could make the tabs say anything you want.

Tabs

Tabs

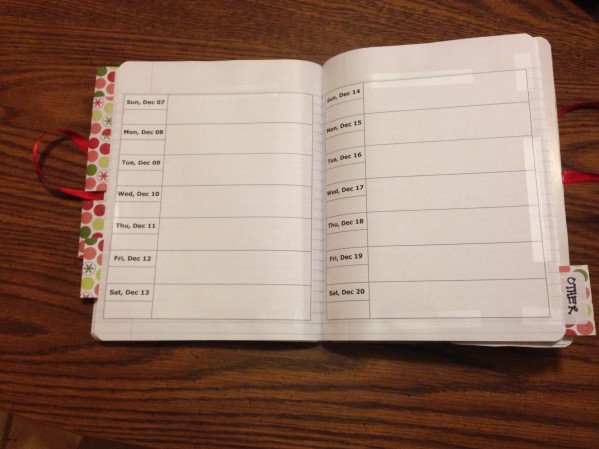
I taped the tabs into place. I taped the calendar pages into place. If I make this next year, I will get some double stick tape so you don’t see it, but for the first time, it looks pretty good.

Calendar in place

Calendar in place

Doesn’t it look so nice with all the pages blank? I use the other section as a sort of journal/notes for next year place. It has been the least used section, but I feel better knowing it is there. I use the to do to keep a running list of everything I need to accomplish this season. The lists are gift lists for people, crossed out when purchased. Events is my planning section for events. For each event what do I need to bring, when is it, all the pertinent details for me. The schedule is for the incredibly busy days when I have to schedule even my free time so I can get everything finished. Calendar keeps the dates and deadlines hyper organized.

Tabs taped in

Tabs taped in

Several people have asked about me making them one, so I think I may try to get some of these together early next year and sell them. I may also add some pockets on the inside covers for receipts/coupons/other items not in the book. For this year, it is too late, as I am already doing enough! What do you do to help stay organized during the holidays?